Table of Contents
(for viewing Elderplan member data records on the 1upHealth app)
Section 1: 1upHealth Registration and Login Process
Section 2: Logging into Your 1UpHealth Account
Section 3: Importing Your Data into your 1UpHealth Account
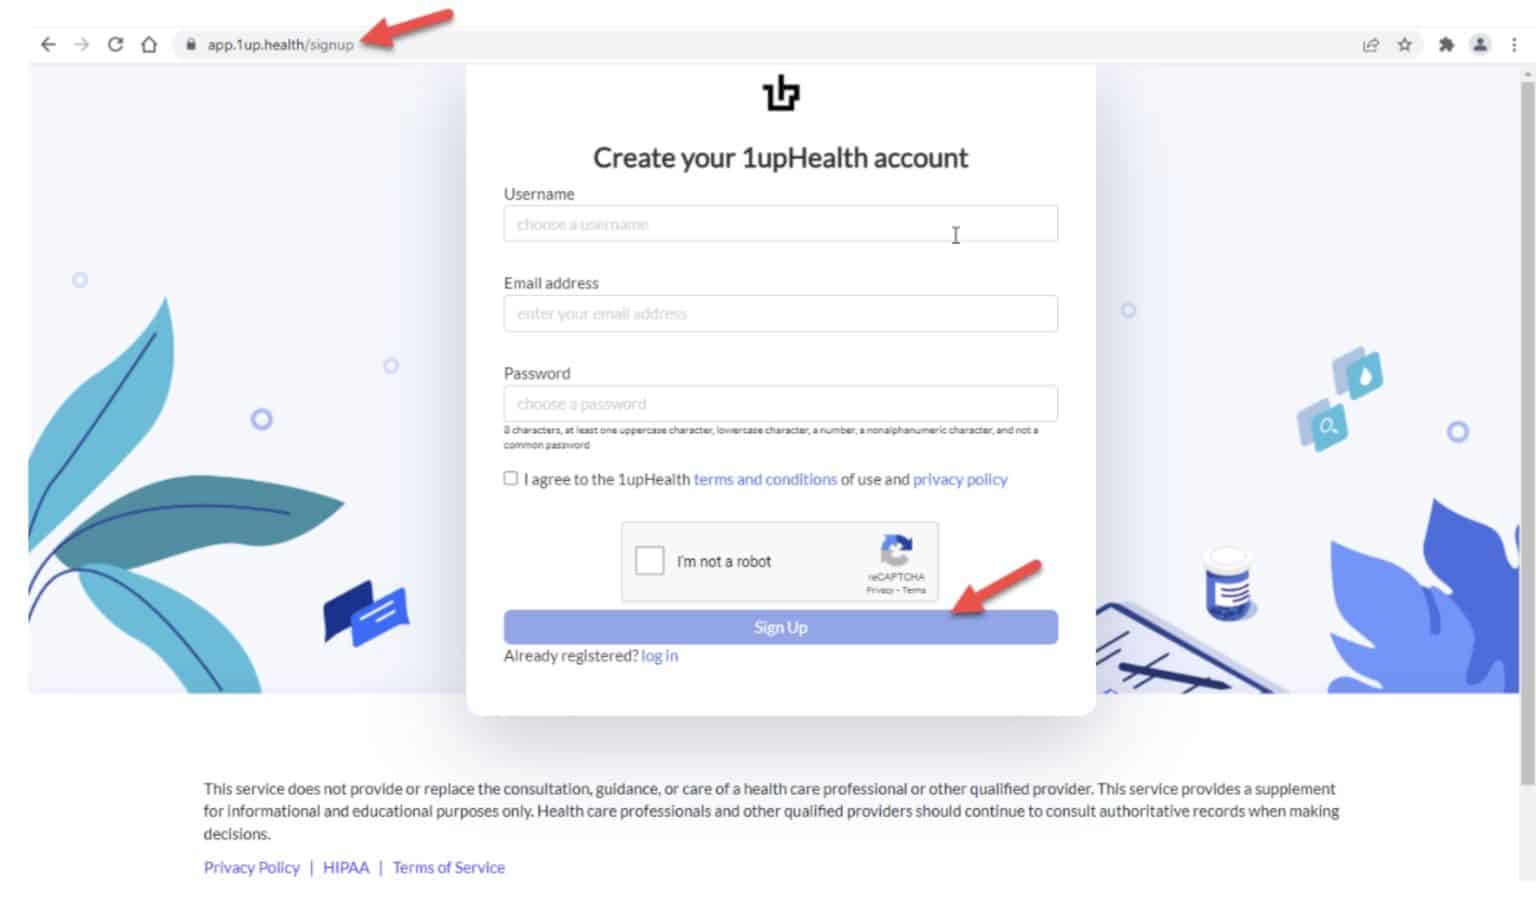
Step One: Create Your 1upHealth Account
- Go to https://app.1up.health/signup
- Choose a username, enter your email address, create a password and click the “Terms and Conditions” agreement check box.
- Click the “I’m not a robot” check box and follow the instructions to choose images related to the keyword. Lastly, click the “Sign Up” button on-screen.
For password creation, the following instruction appears on the sign-up screen: “8 characters, at least one uppercase character, a lowercase character, a number, a non-alphanumeric character, and not a common password”.
Only one registration is allowed per individual email address.
Step Two: Complete Registration
You will then be prompted to check your email and click the “Complete Registration” link to complete the registration process. Once this is achieved, you are ready to log into your account.
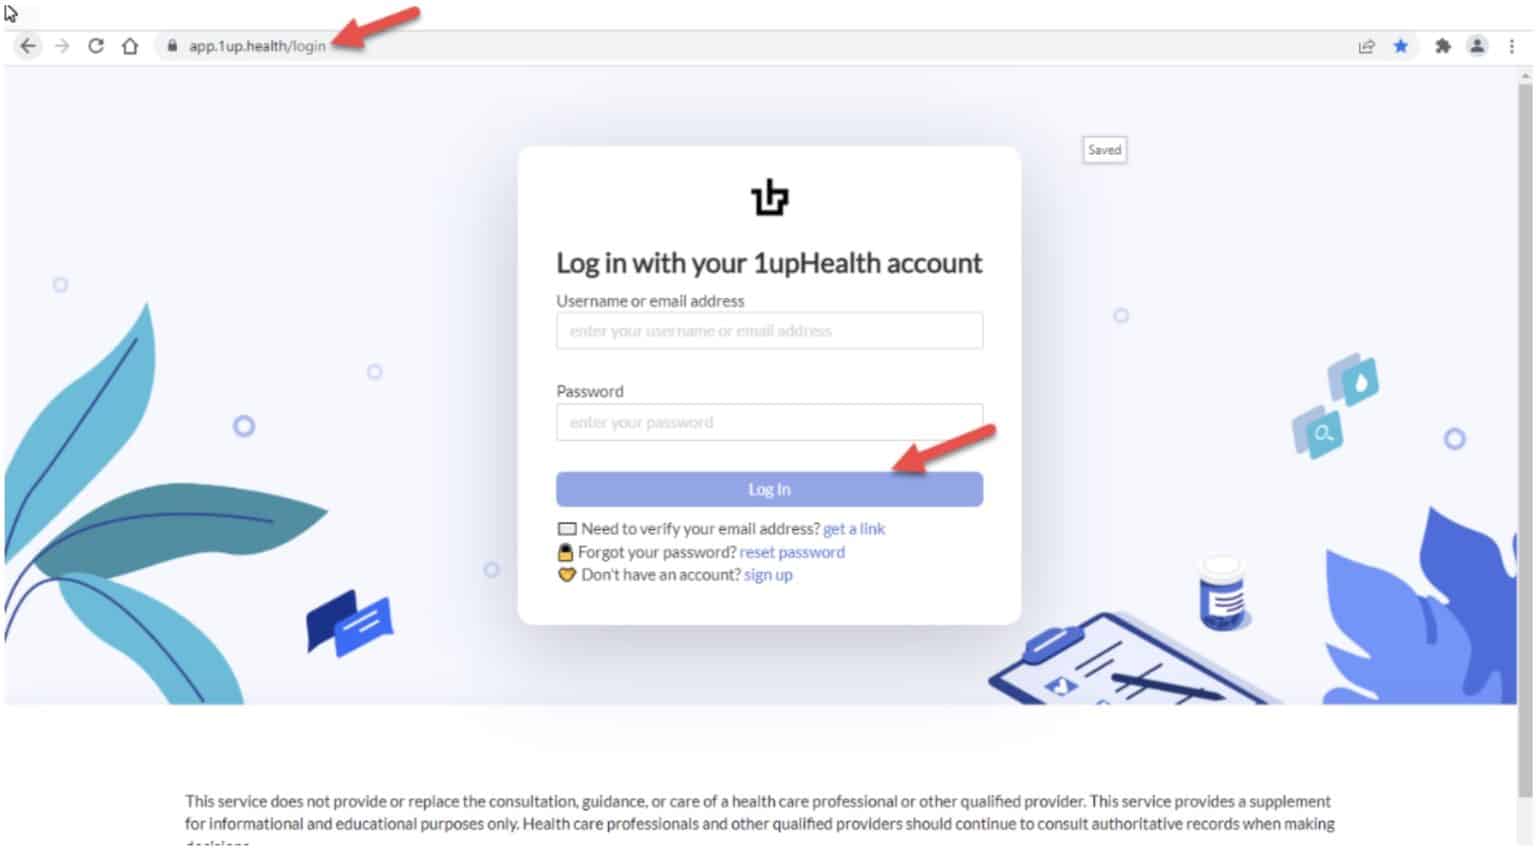
Step One: Go to The 1upHealth Site
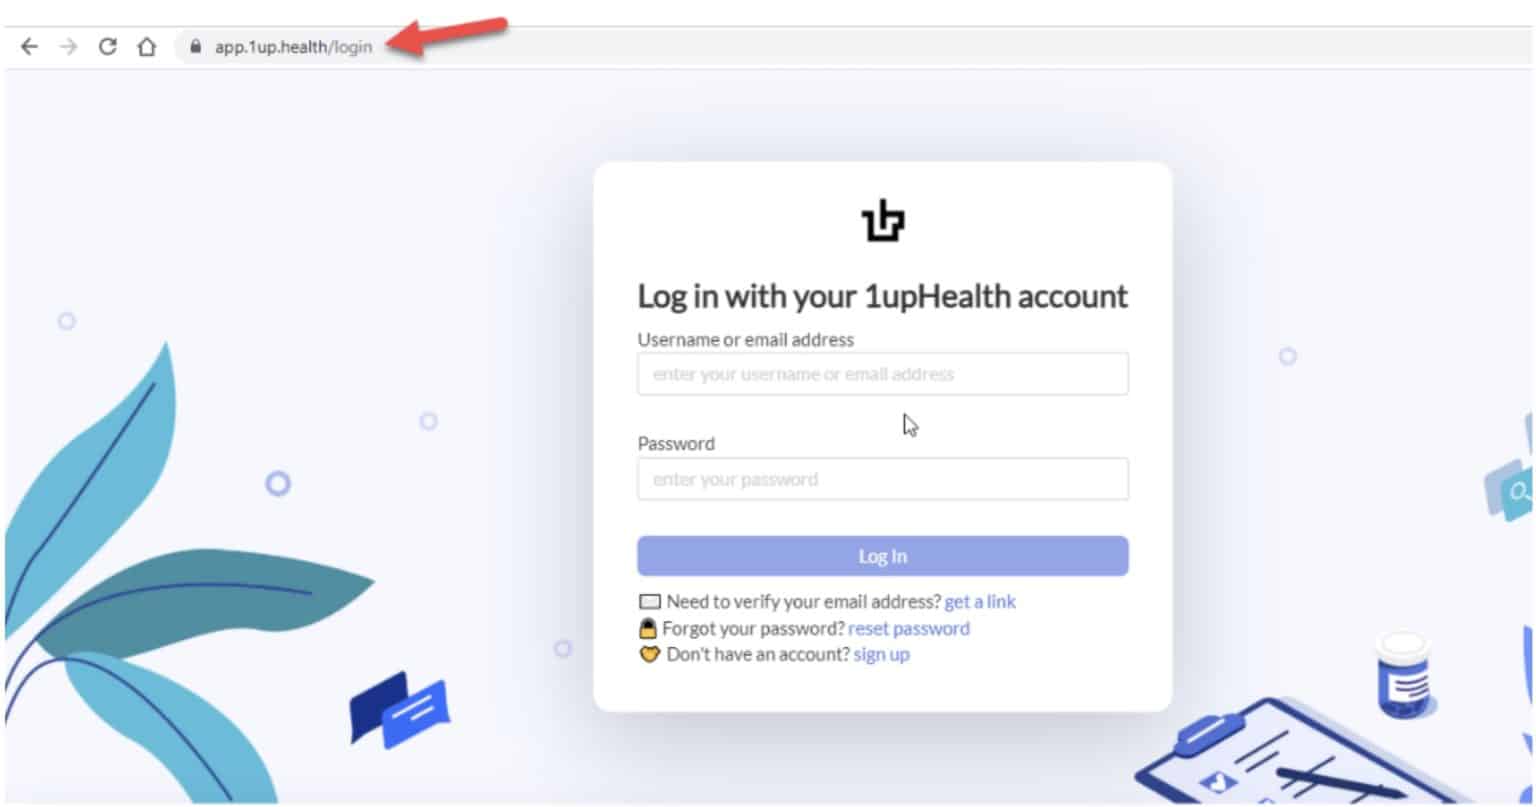
- Go to: https://app.1up.health/login.
- Enter the username/password combination selected when setting up a new account and click the “Log In” button.
Step One: Log into 1upHealth Account
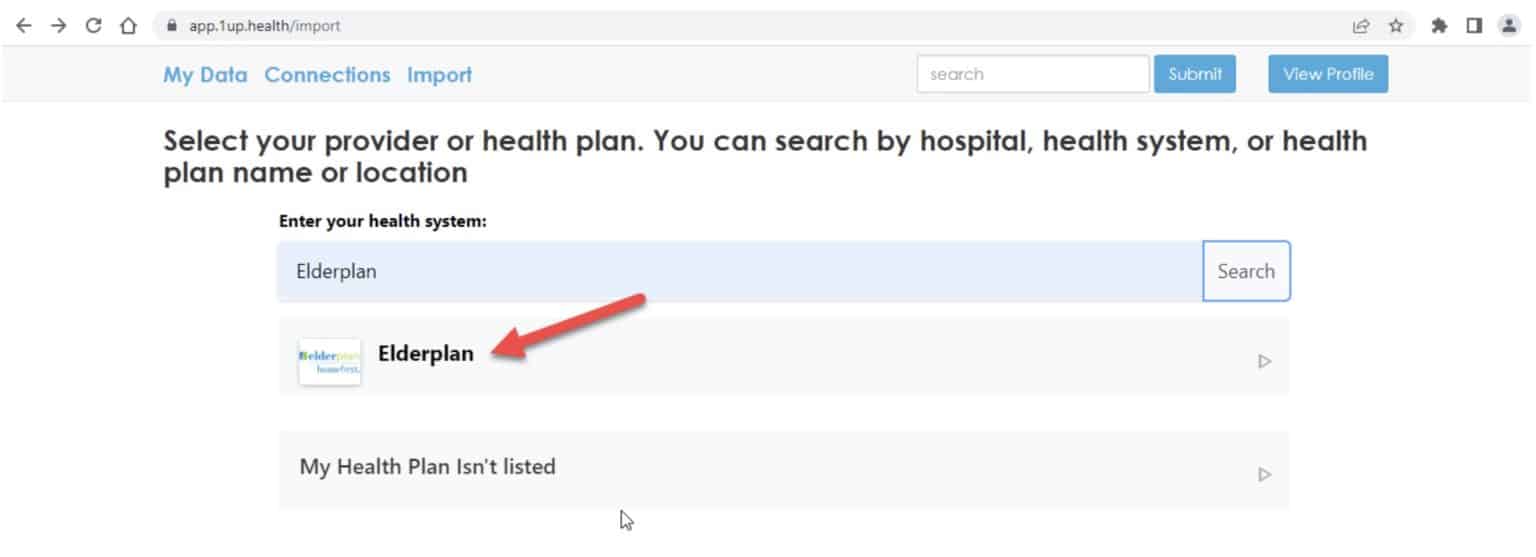
- Once logged into the app, you can import your data records into the app by clicking the “Import” button.
Step Two: Select Your Health Plan: Elderplan
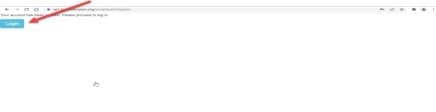
- You will be routed to an Elderplan portal. You must create a separate Username and Password to access this data.
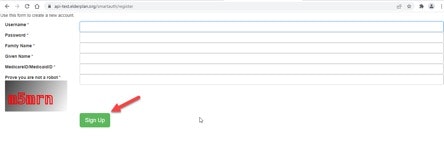
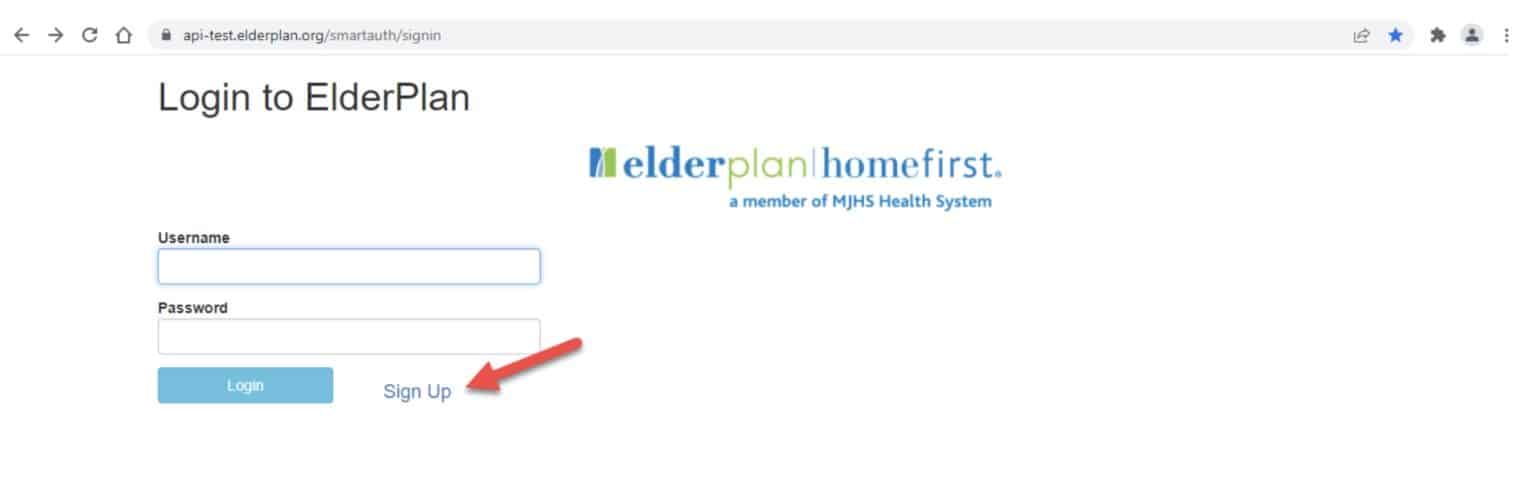
Step Three: Register for your Elderplan Account
Now that you’ve successfully landed on the Elderplan login screen click the “Sign Up” button on the screen to begin the registration process for your Elderplan account.
You’ll be asked to create a new account. Follow the prompts. A username, password, family name, given name, and most importantly, Medicare ID or Medicaid ID are required to complete the Elderplan registration screen.
You’ll also be asked to prove that you are not a robot by inputting information shown in the grey box in the “Prove you are not a robot” data field.
Finally, click the “Sign Up” button at the bottom of the screen.
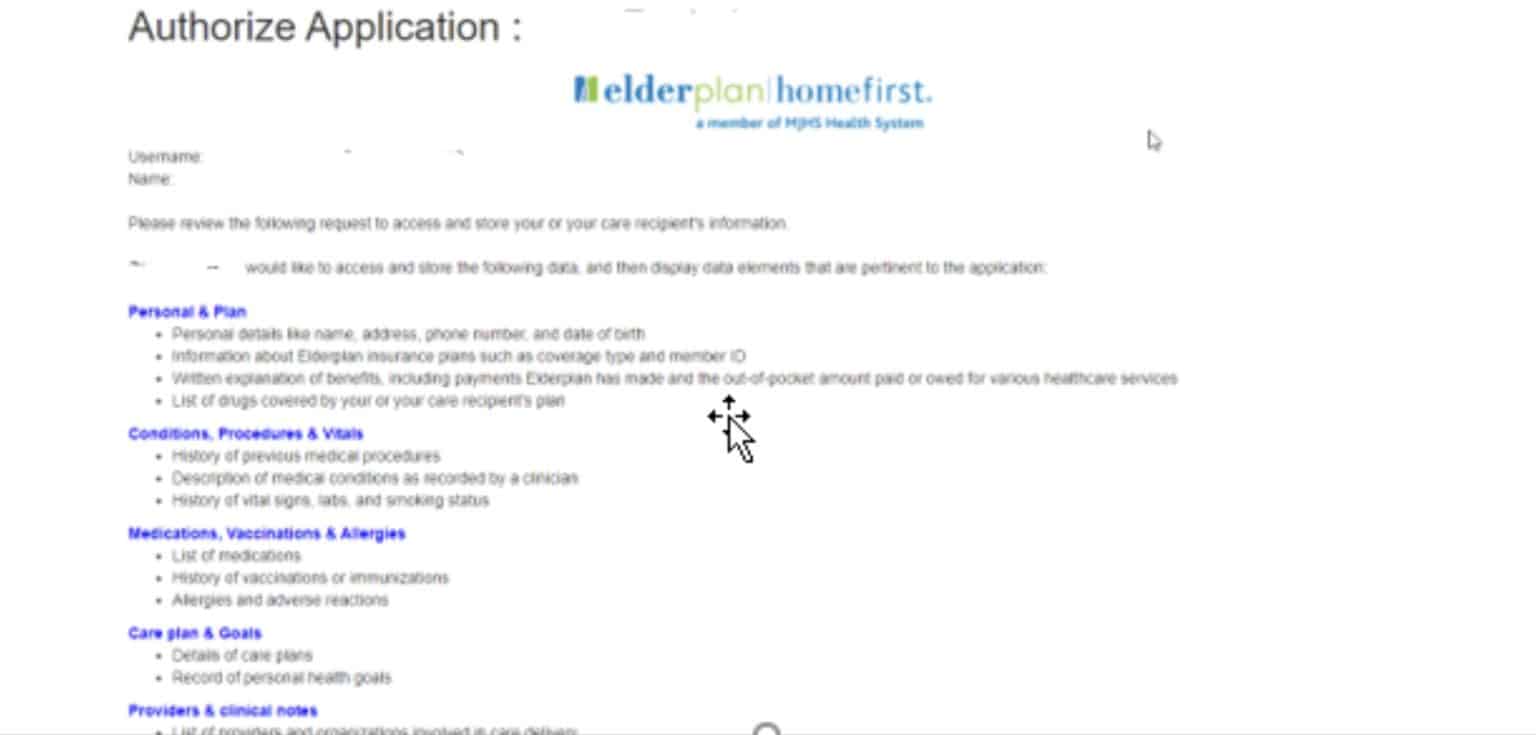
Step Four: Authorize Application to Connect Data
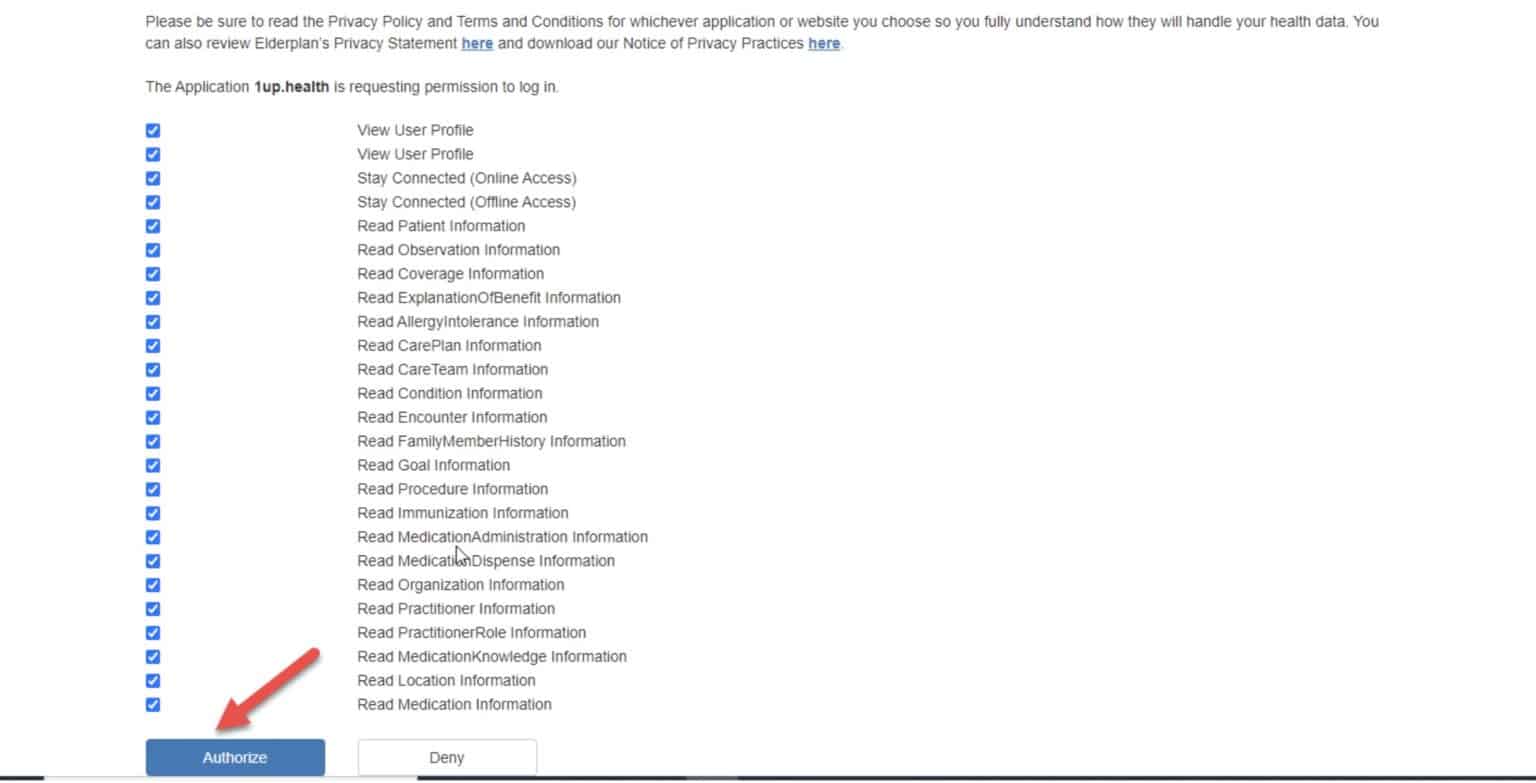
Once you complete the registration/login process for Elderplan, you will be transitioned to the “Authorize Application” screen. Click the “Authorize” button on this screen to initiate the download of your Elderplan data records to the app (for viewing purposes on the app).
In addition, there are multiple checkboxes, for example, “Read Patient Information” and “Stay Connected (Offline Access)” that appear on the Authorizations screen. Those checkboxes automatically default to a checkmark status. You should retain that check mark status for all checkboxes before authorizing the download of data records to the app.
After clicking the “Authorize” button on the Authorize Application screen, you will return to the My Data Helps screen. The app will begin downloading your Elderplan data records (to the screen).
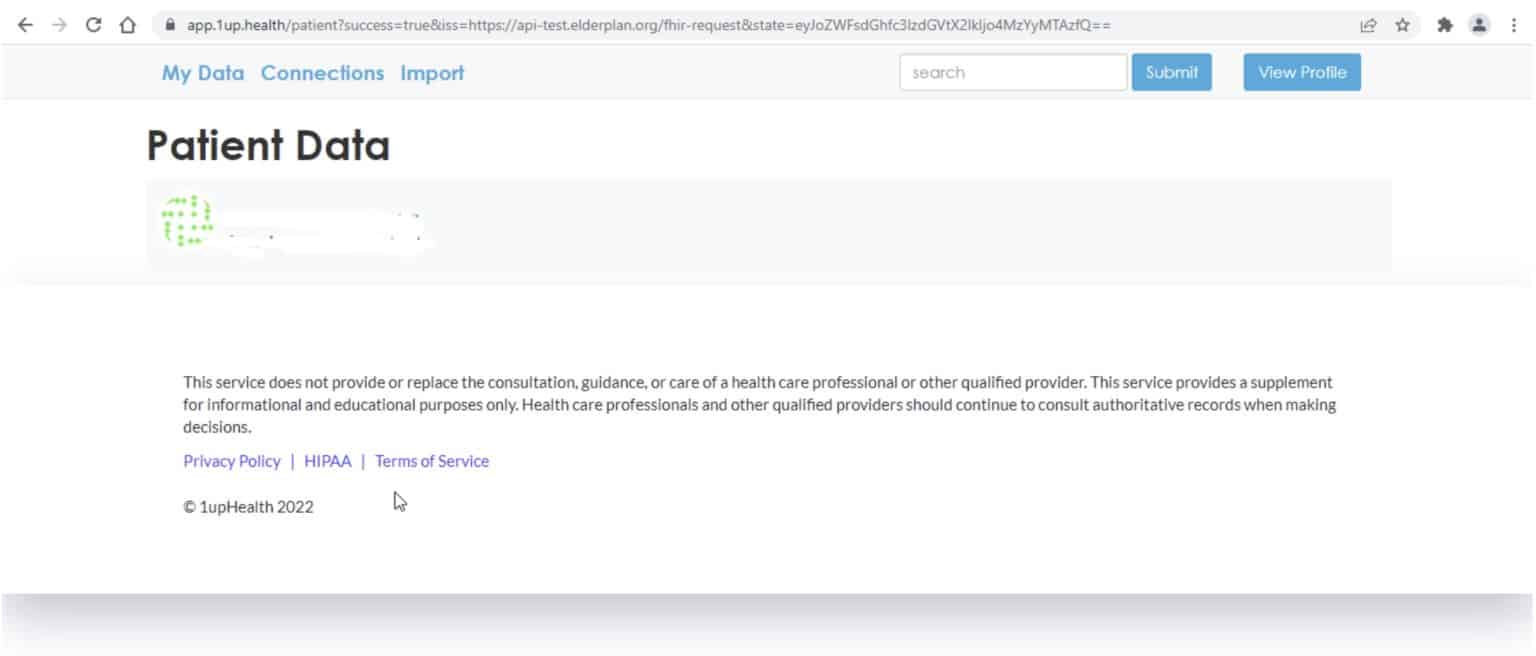
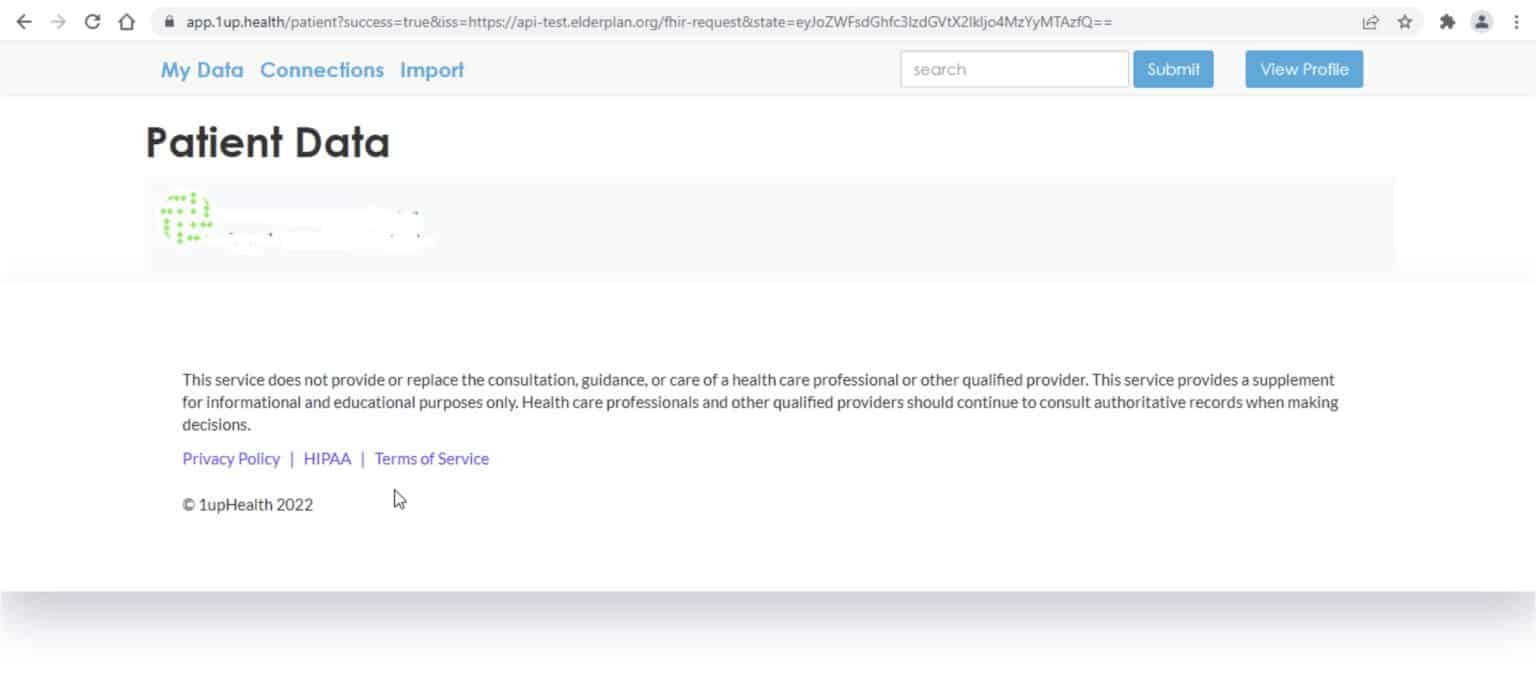
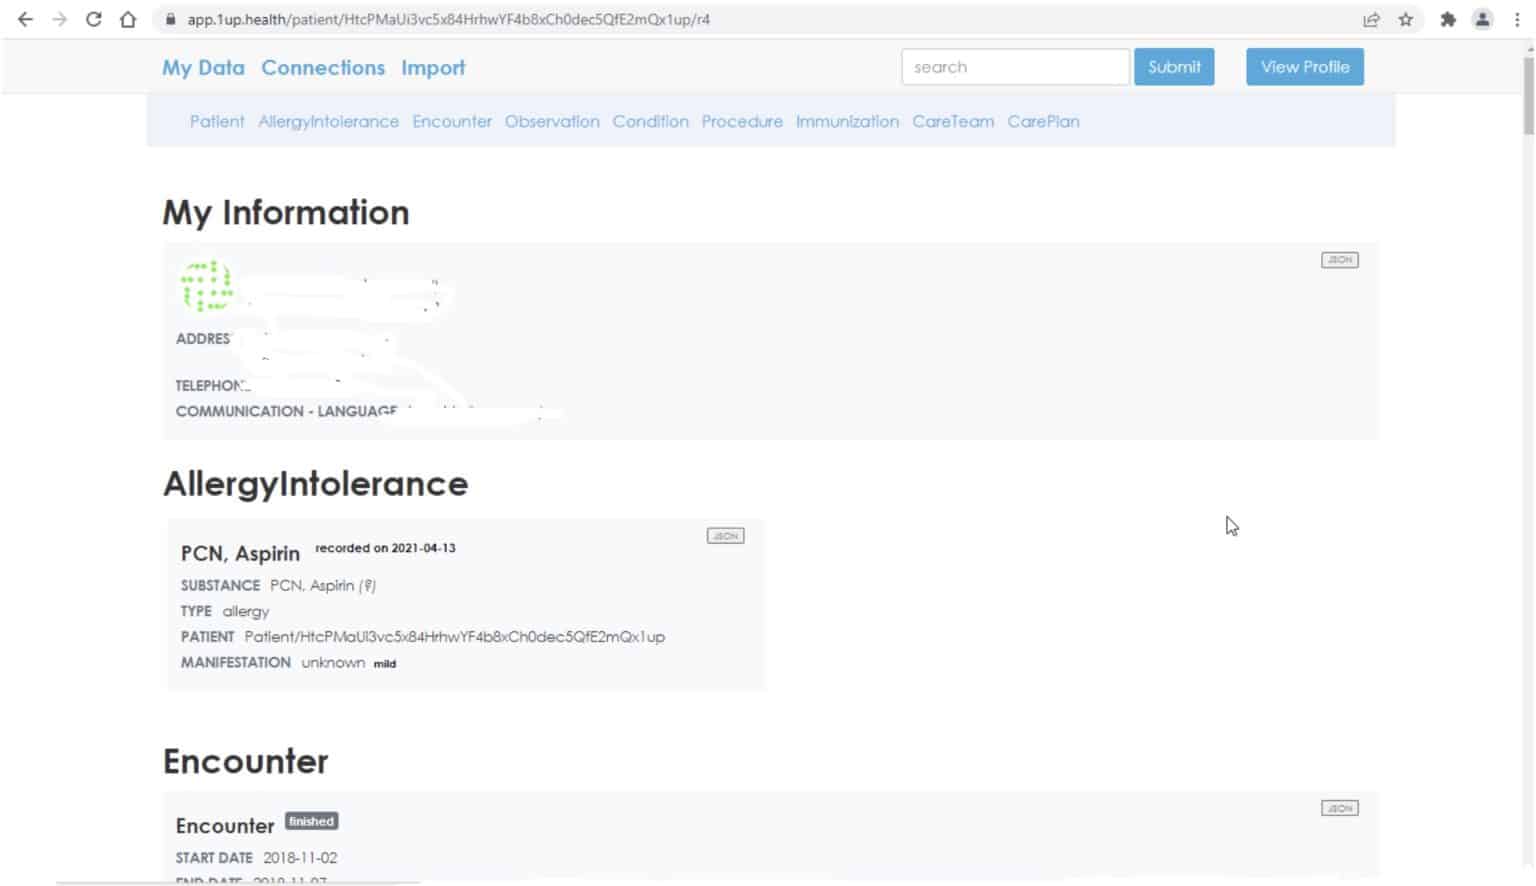
Step Five: View Your Records
Once data records are downloaded, you can view your records on the app, beginning at the “Patient Data” screen. Click the member’s name on the “Patient Data” screen to access other records on the “My Data” screen.
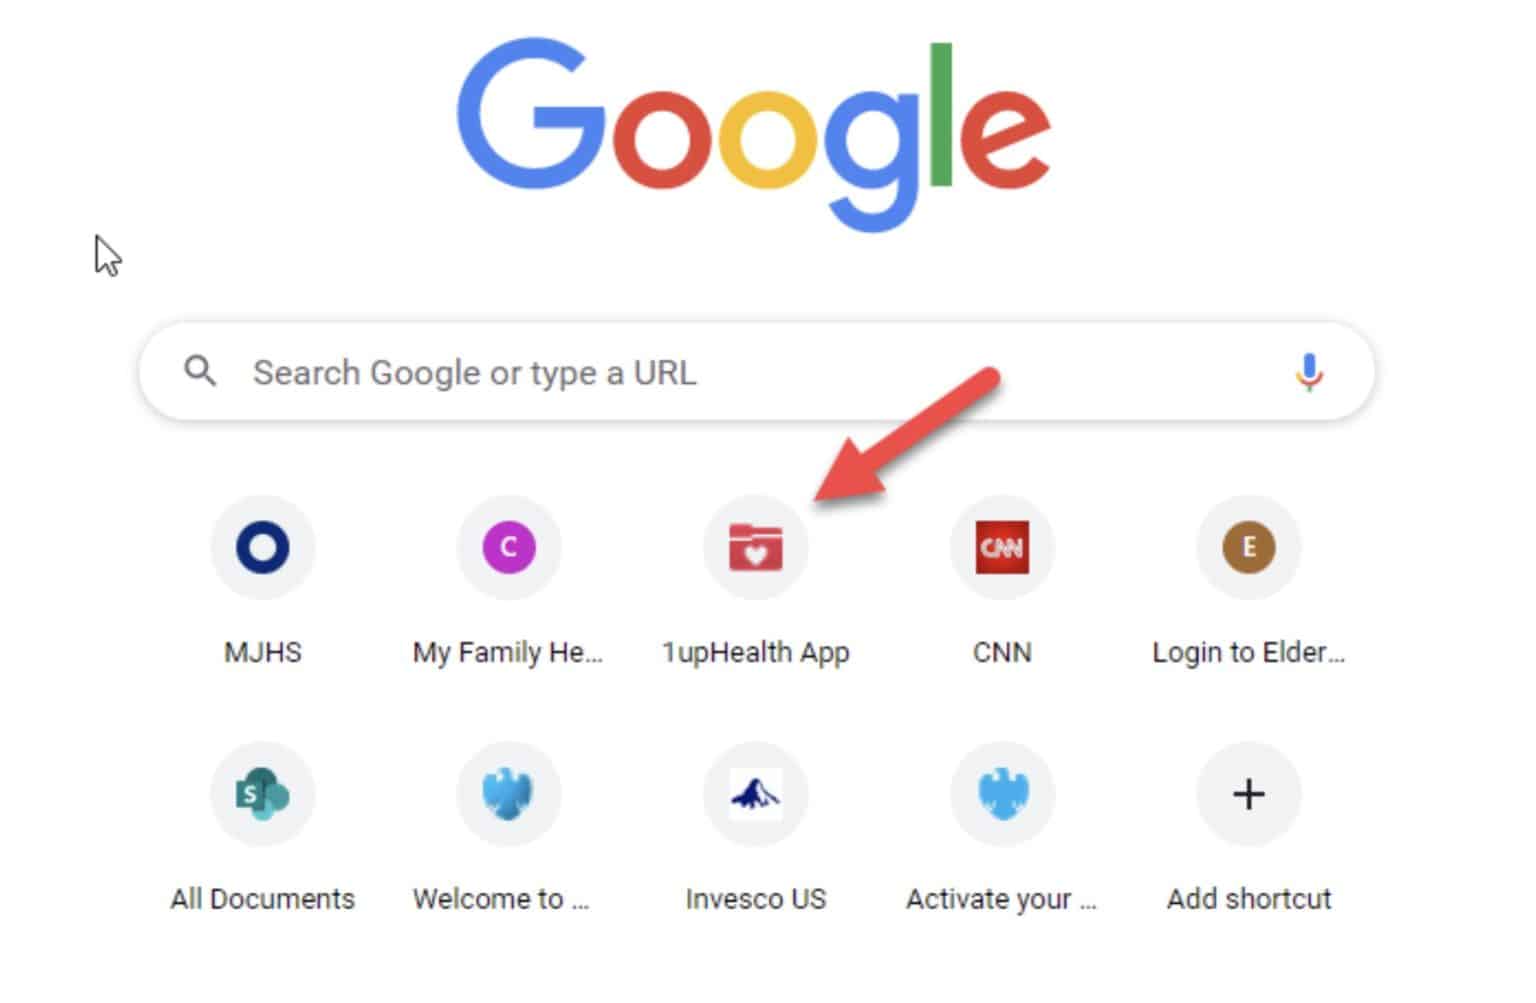
Step One: Log In to 1upHealth App
The easiest method for logging back into the app is by clicking on the “1upHealth App” icon (representing 1upHealth) that can be saved to a typical browser search screen.
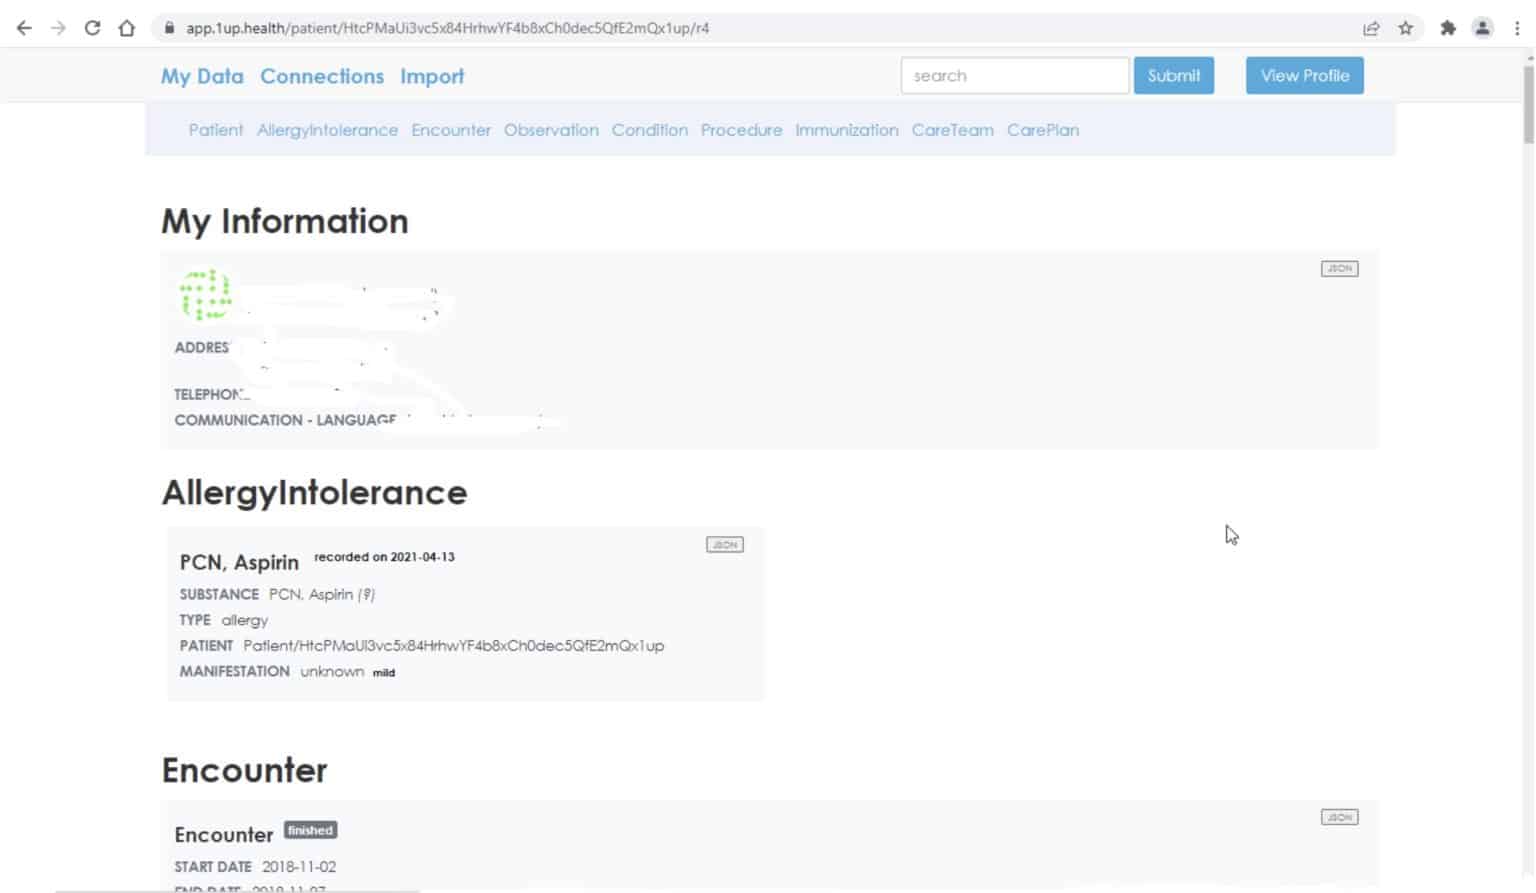
Step Two: Access Your Patient Data
Once you have logged in, you will be routed to the “My Data Helps” screen, where the user can access your data records on that screen.
If you forget your prior defined username/password combination or prior defined email address/password combination to log into the app, click the “Reset Password” link on the https://app.1up.health/login screen. Follow the app instructions for resetting login parameters.
Once an initial set of Elderplan data records have been downloaded to the app, that set of records is static and cannot be updated. To view updated records, delete the existing set of data records and then load a new set of data records. To do this:
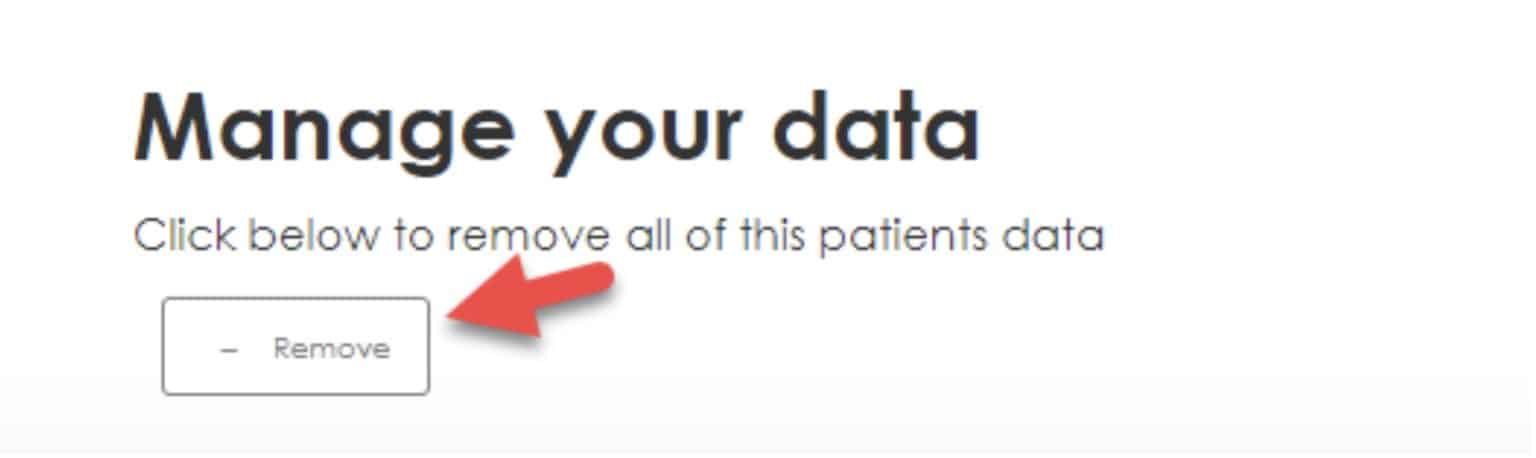
Step One: Remove Current Records
While logged into the app and viewing data records on the “My Data” screen, a user can delete that existing set of data records by clicking the “Remove” button in the “Manage your data” section at the bottom of the screen.
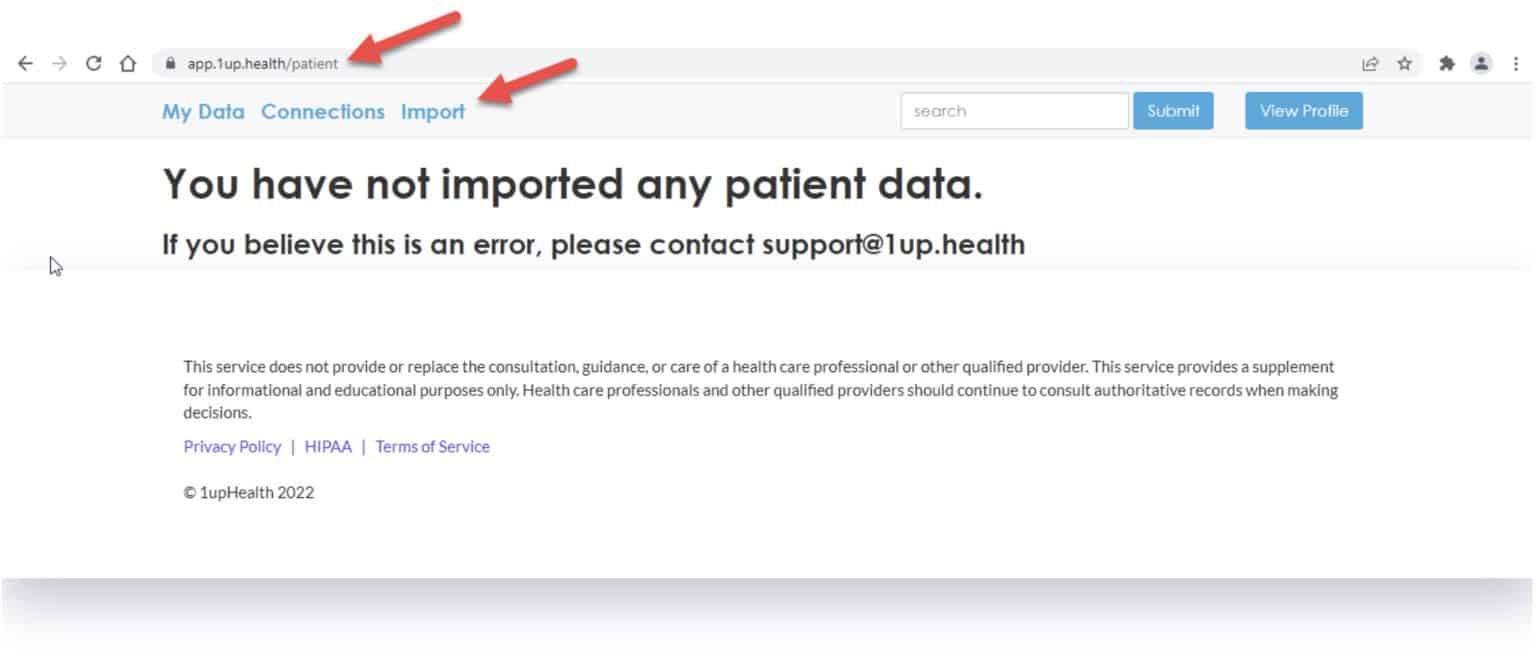
Step Two: View Patient Screen
The data record removal action should transition you to the https://app.1up.health/patient screen, where you can import a new complete set of (updated) data records.
Step Three: Re-import Your Data
Re-execute Step One, Step Two, and Step Four under Section 3: Importing Your Data into your 1upHealth Account in order to view a full set of updated data records for the Elderplan member prior to Step 2 in Section 4: Viewing Existing Elderplan Set of Records.