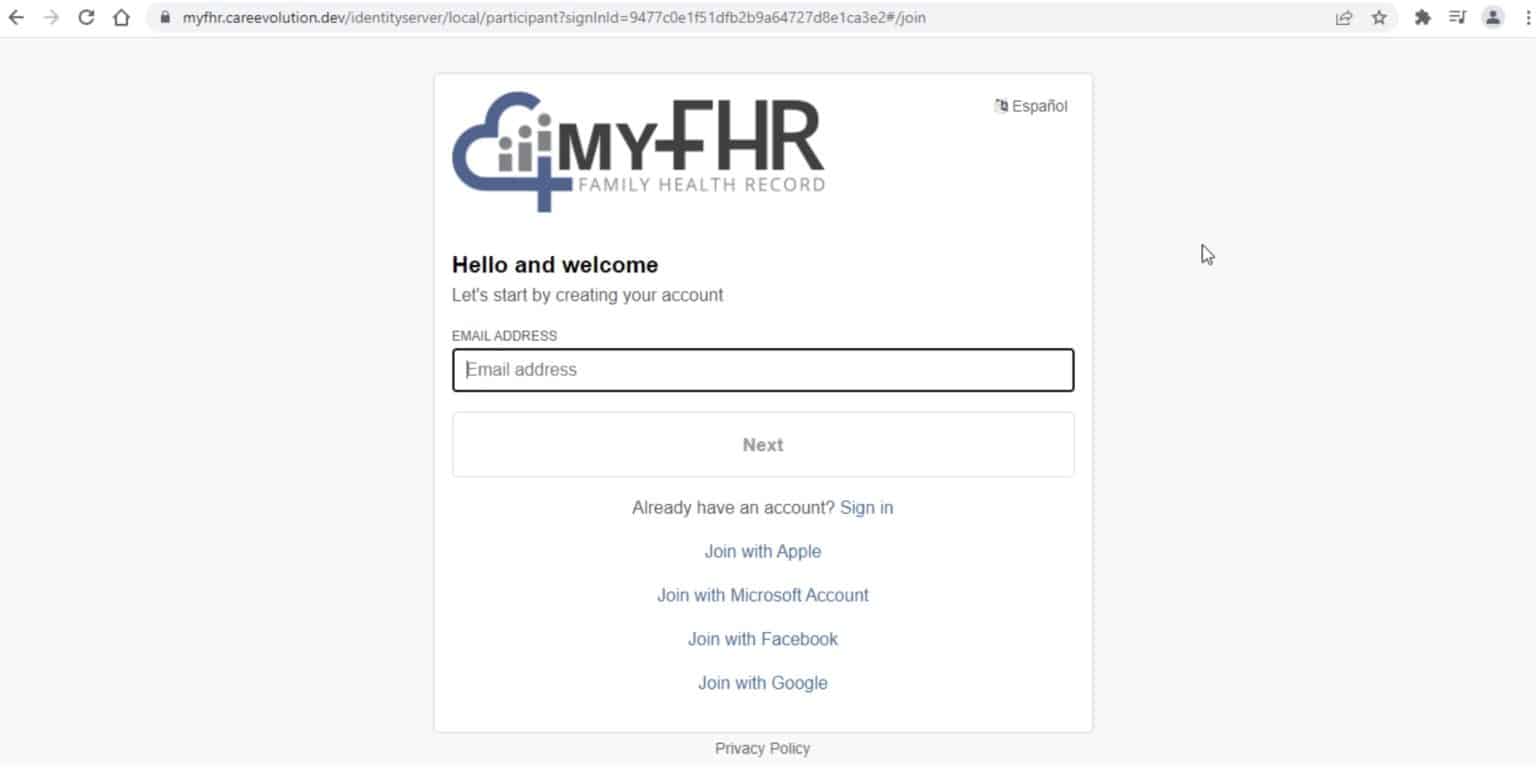
Step One: Create a new CareEvolution account
- Go to myfhr.careevolution.com
- Choose “Join”.
- Input your email address and click “Next.”
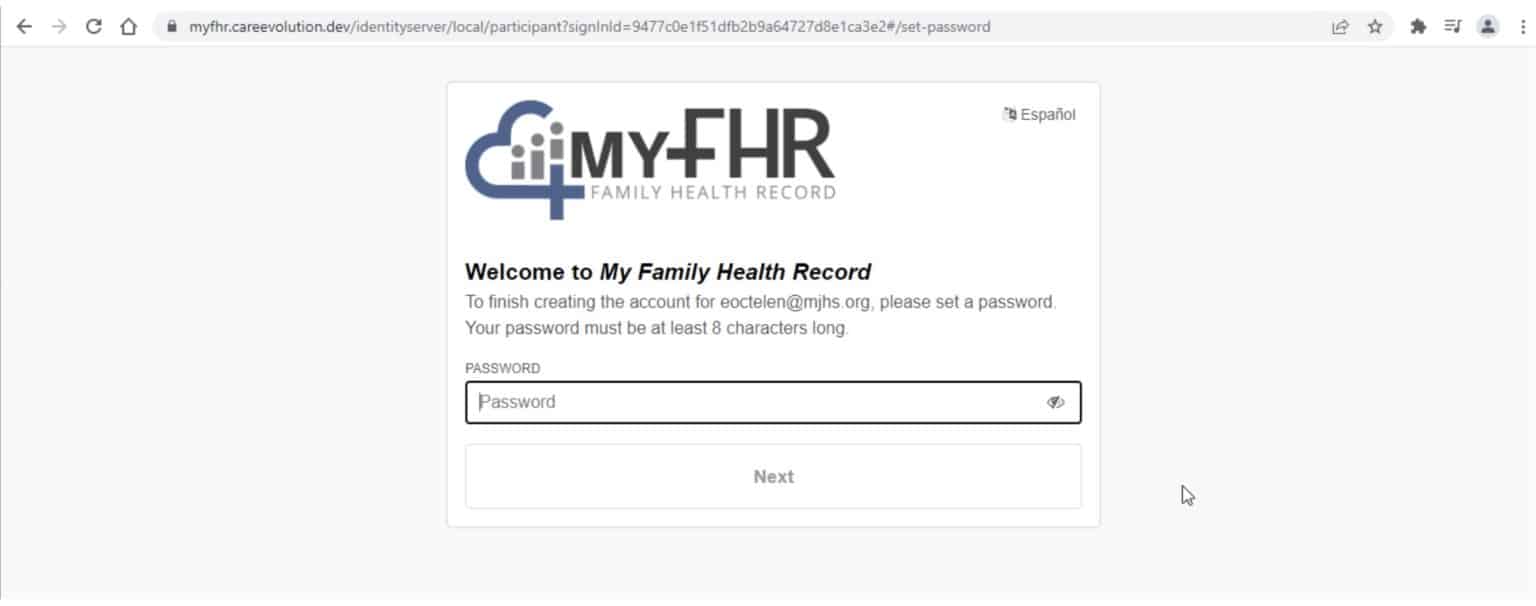
- Choose a password. Your password must be at least 8 characters long and contain at least 3 kinds of characters such as upper-case letters, lower-case letters, digits, and/or special characters (for example, $, %, or &).
For password creation, the following instruction appears on the sign-up screen. Your password must be 8 characters long.
Only one registration is allowed per individual email address.
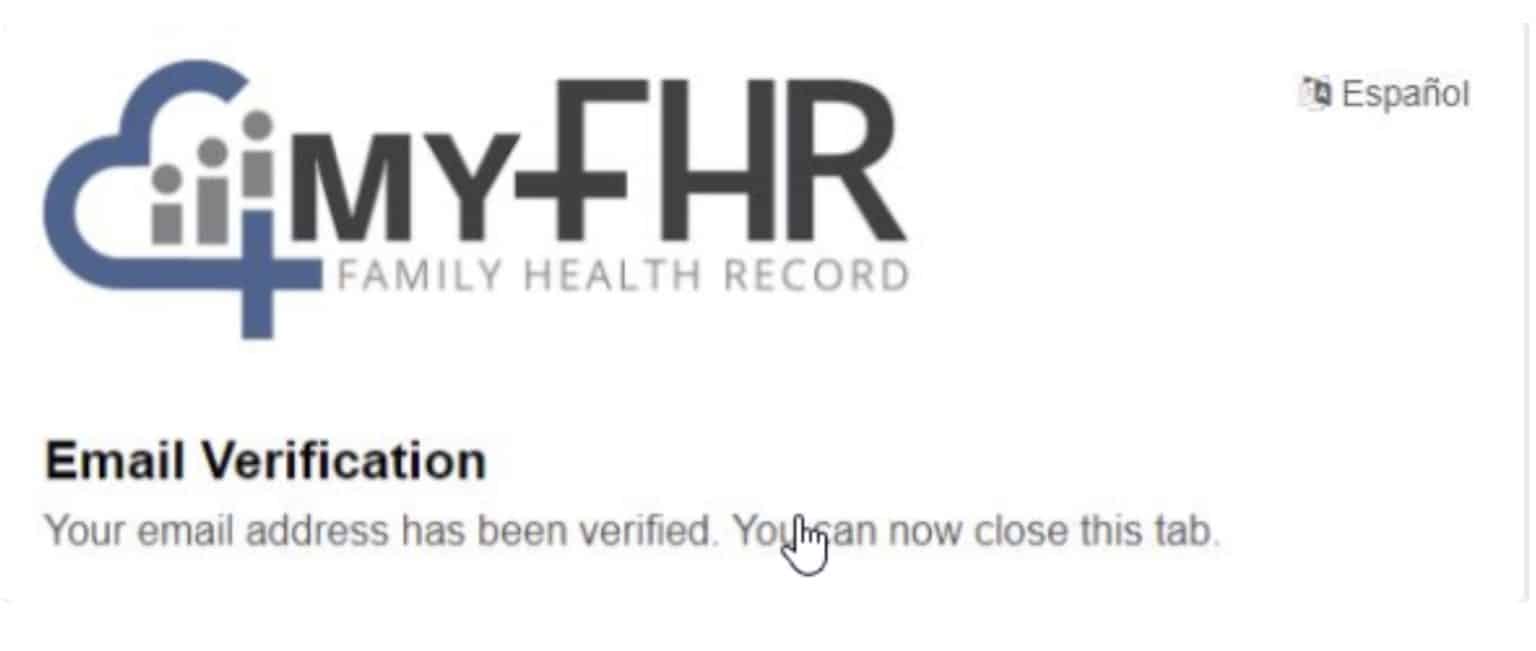
Step Two: Verify Email
Once the registration process is complete, you will receive an email confirmation with a verification link.
Please open the email and click on the verification link.
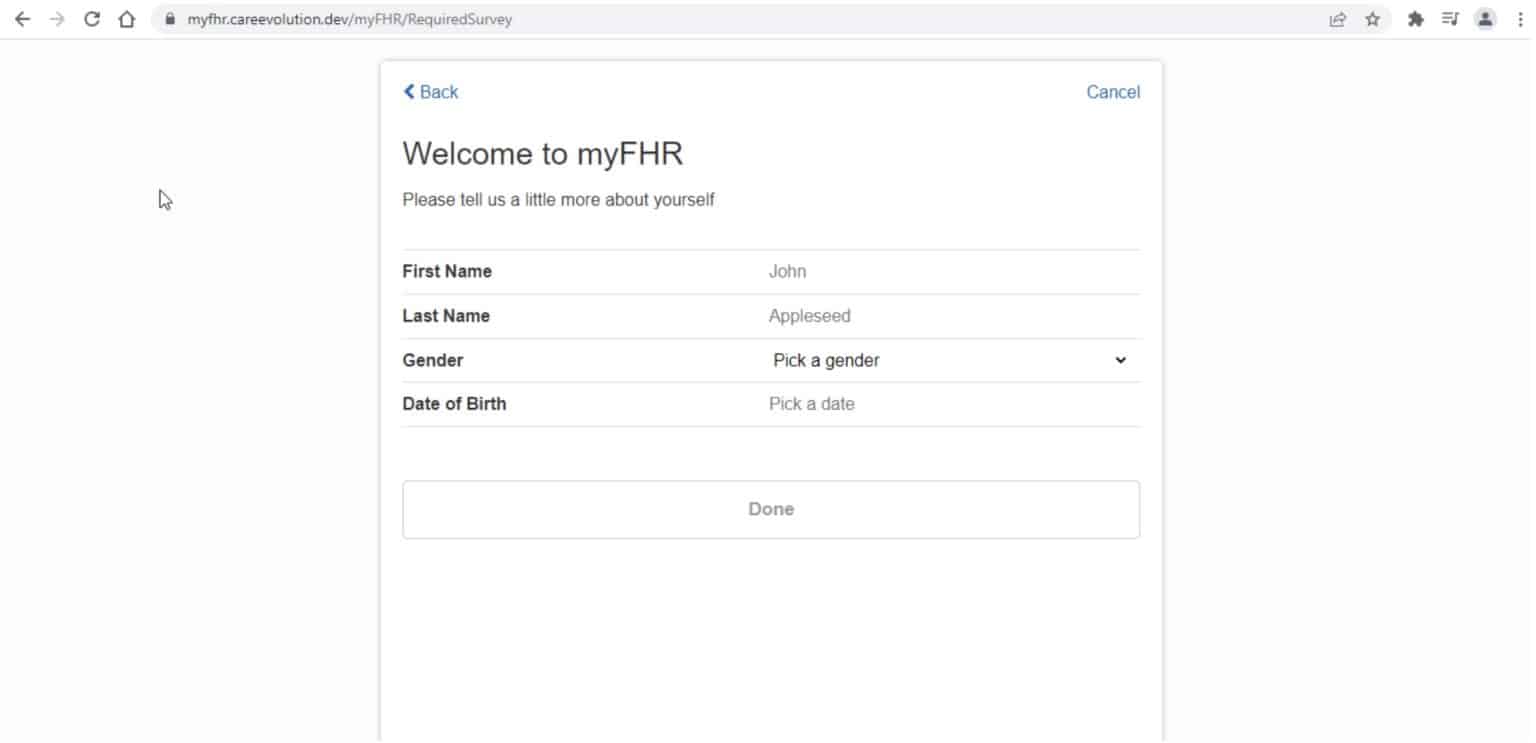
Step Three: Personal Information
On the next page, you’ll be asked to fill in your name, gender, and date of birth. Once completed, click “Done.”
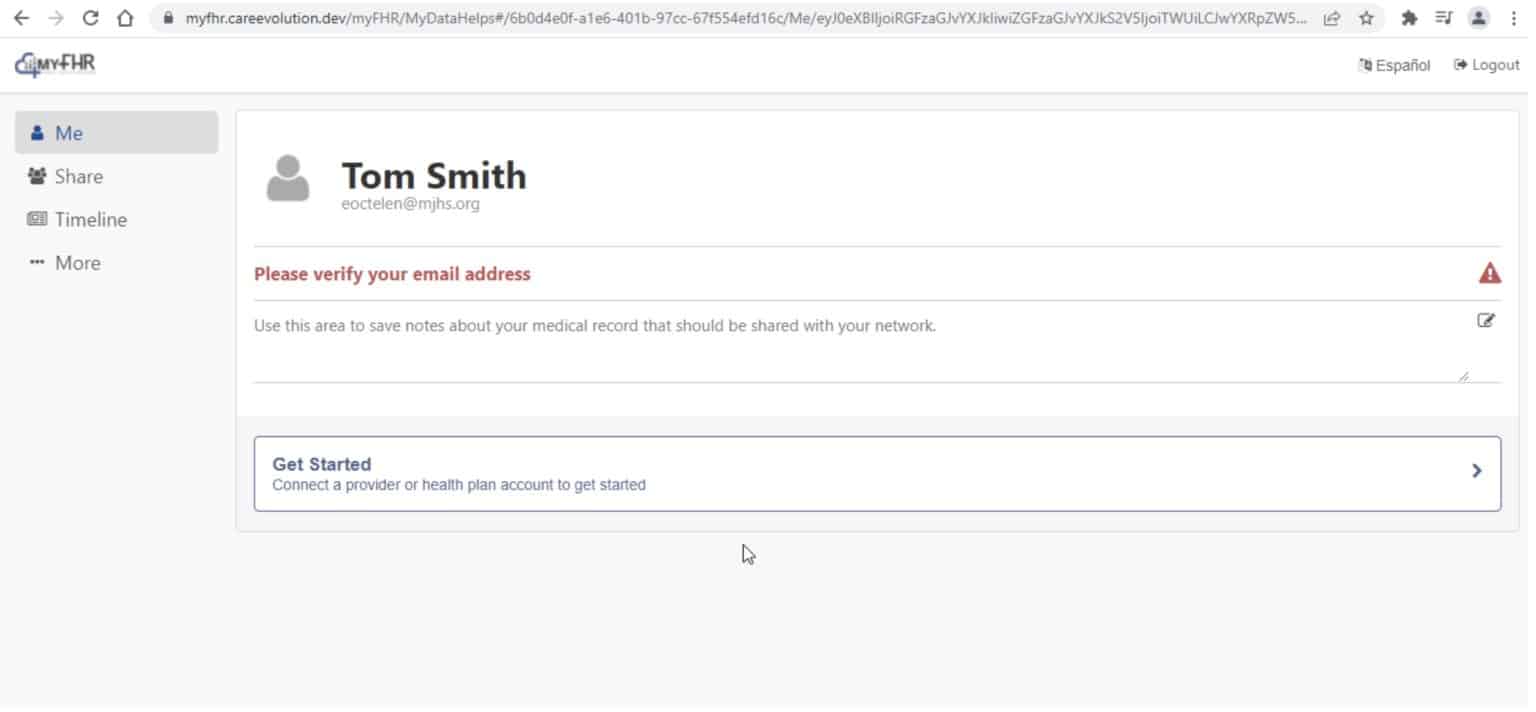
Step Four
Click the “Get Started” button to begin.
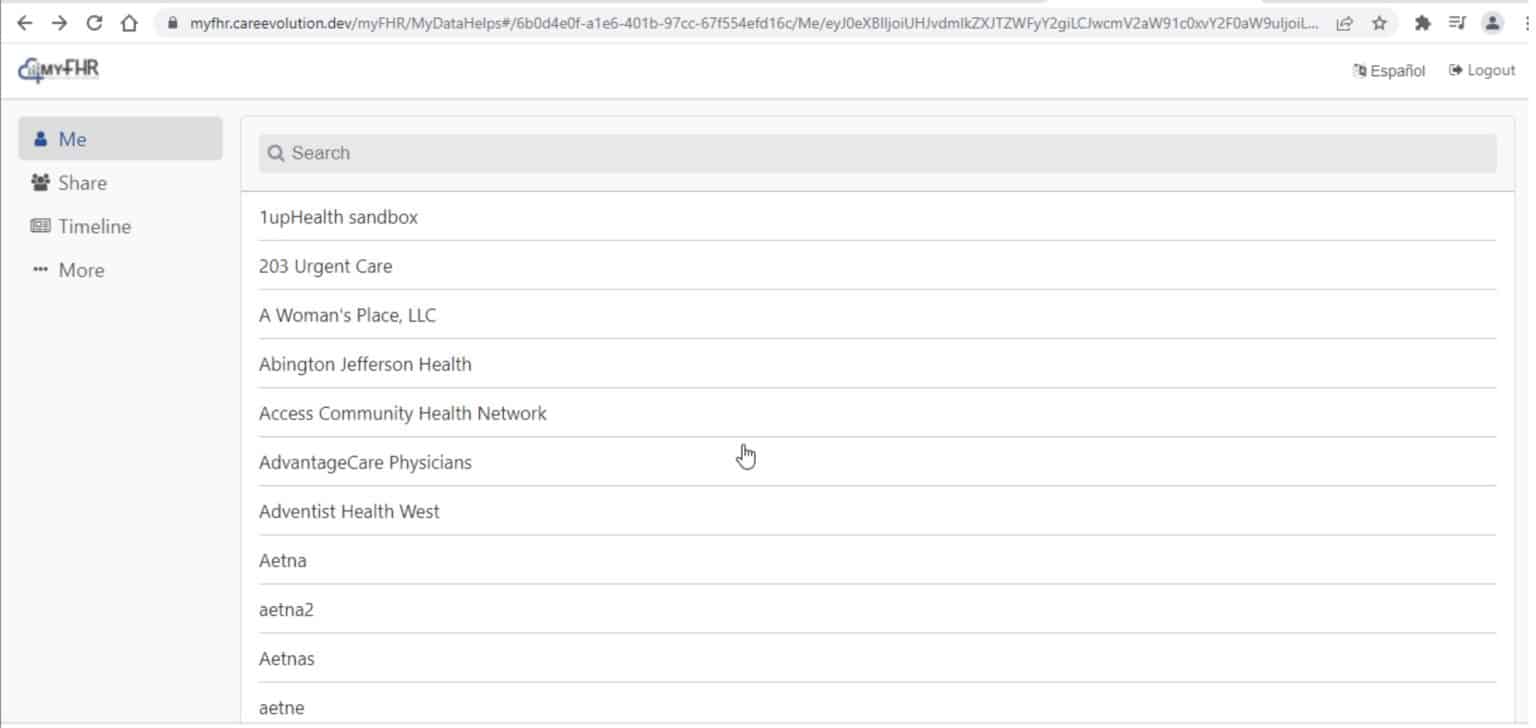
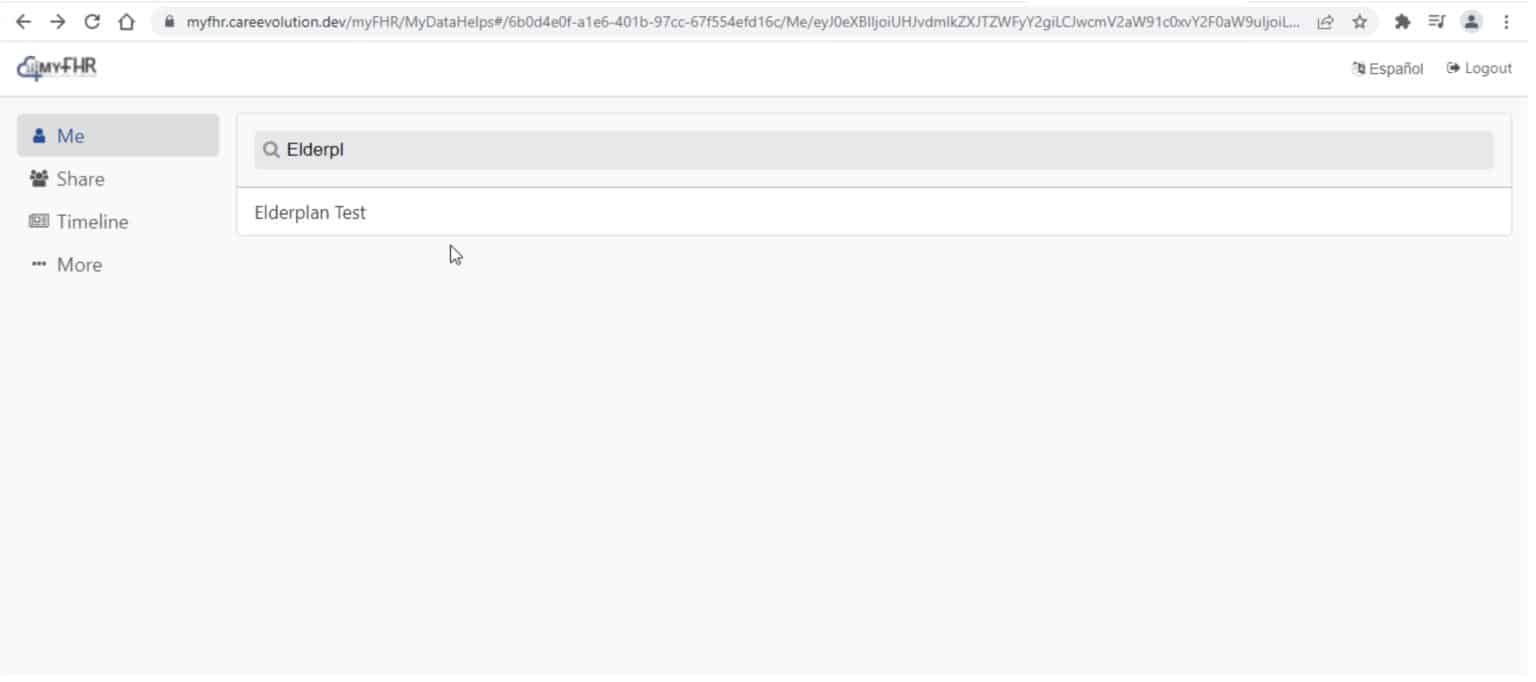
Step Five: Look for ElderPlan
Please scroll down or use the search option to look for Elderplan.
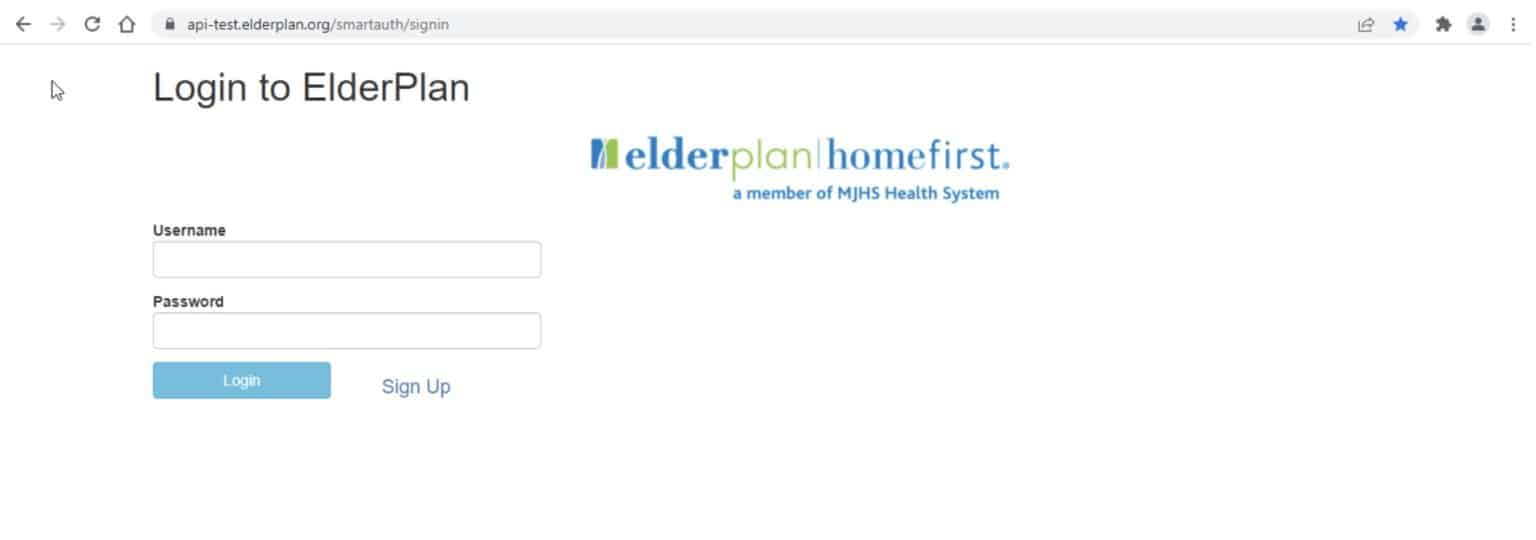
Step Six: Sign Up
Now that you’ve successfully landed on the Elderplan login screen, please click the “Sign Up” button on the screen to begin the registration process for your Elderplan account.
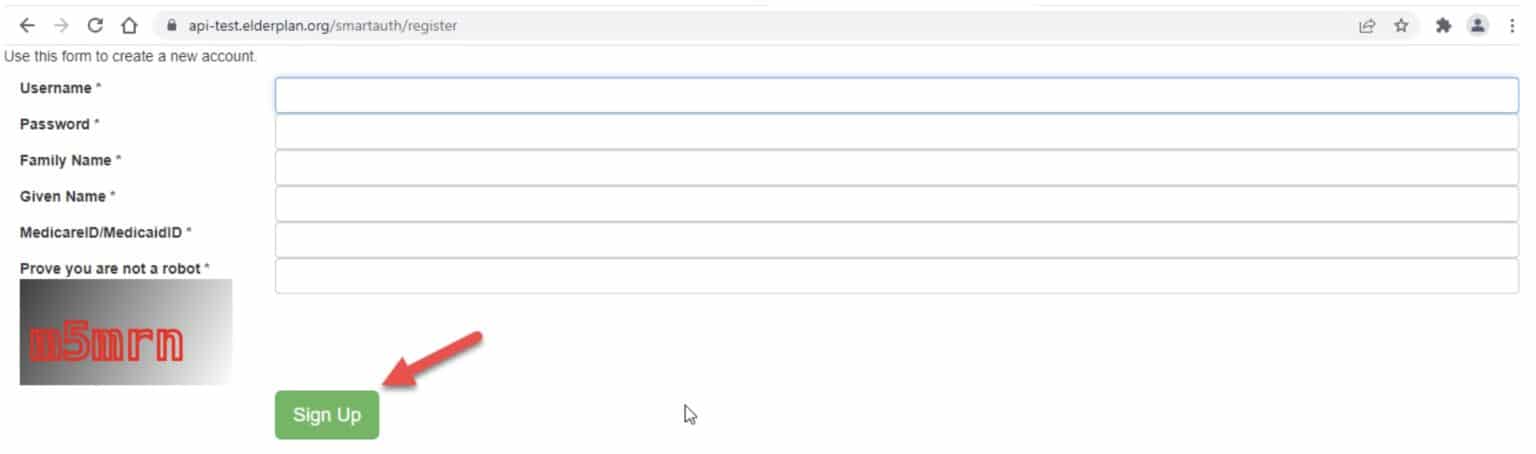
Step Seven: Create Account
You’ll be asked to create a new account. A username, password, family name, given name, and most importantly, Medicare ID or Medicaid ID are required to complete the Elderplan registration screen.
You’ll also be asked to prove that you are not a robot by inputting information shown in the grey box in the “Prove you are not a robot” data field. Finally, click the “Sign Up” button at the bottom of the screen.
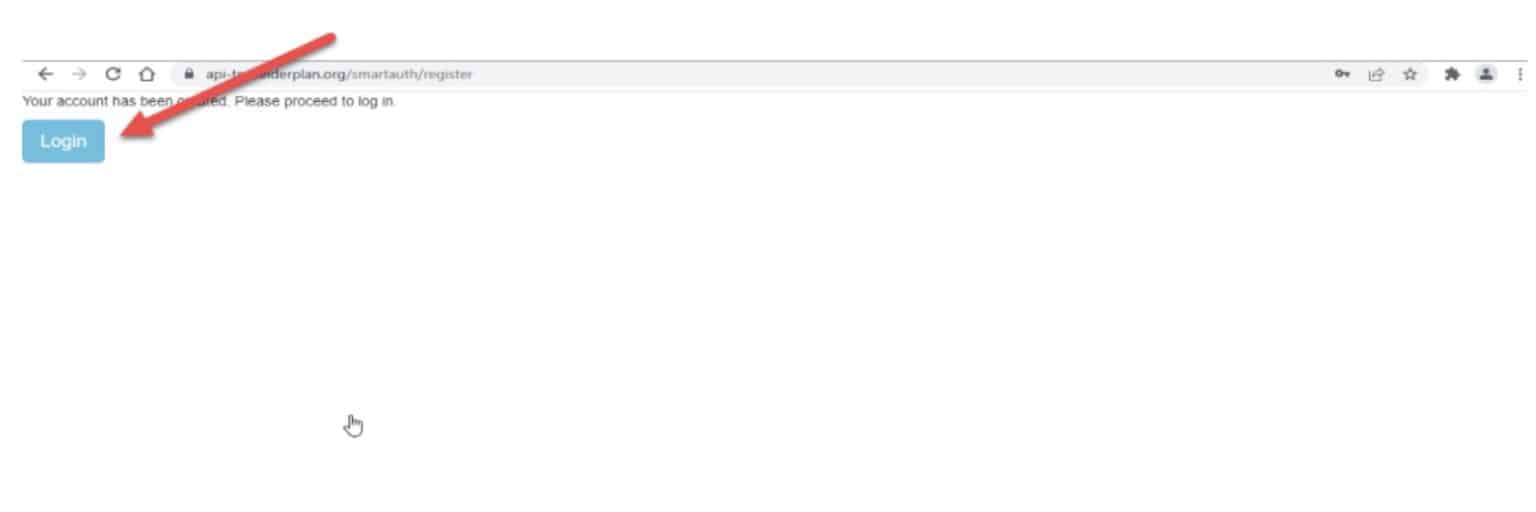
Step Eight: Login
Click the “Login” button on the next screen.
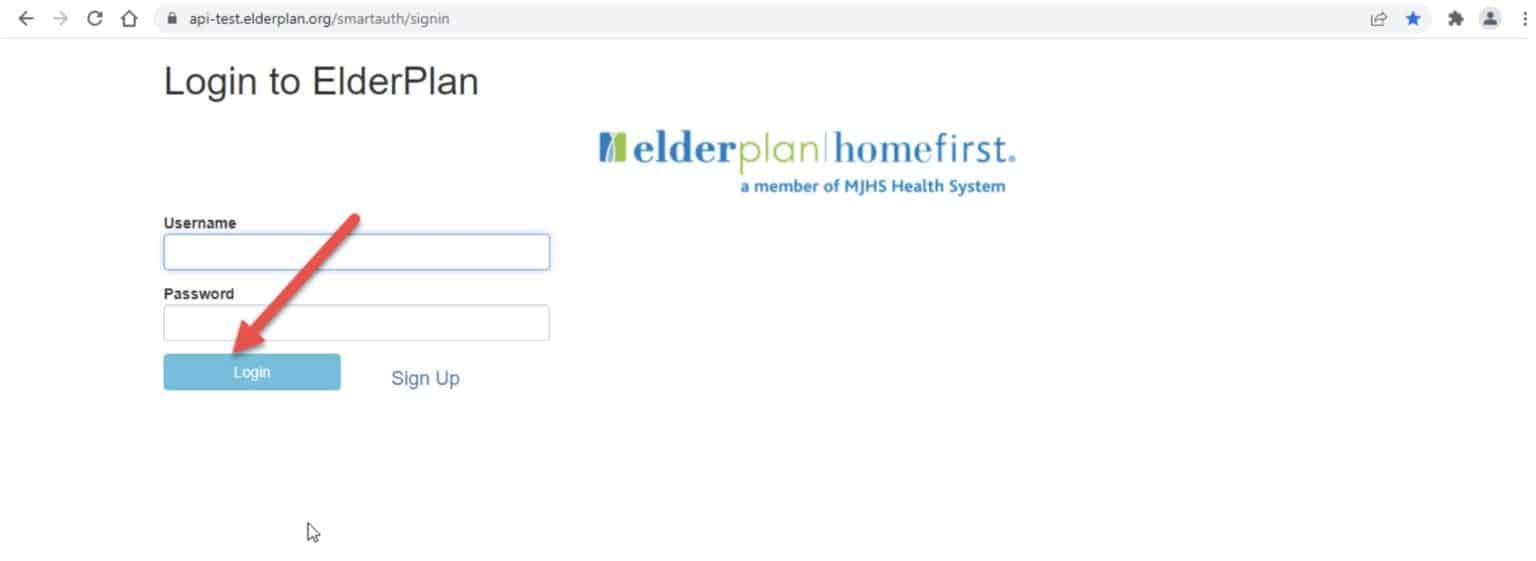
Step Nine: Enter Username and Password
You’re back to the “Login to Elderplan” screen. Please use your created username/password combination and click the “Login” button.
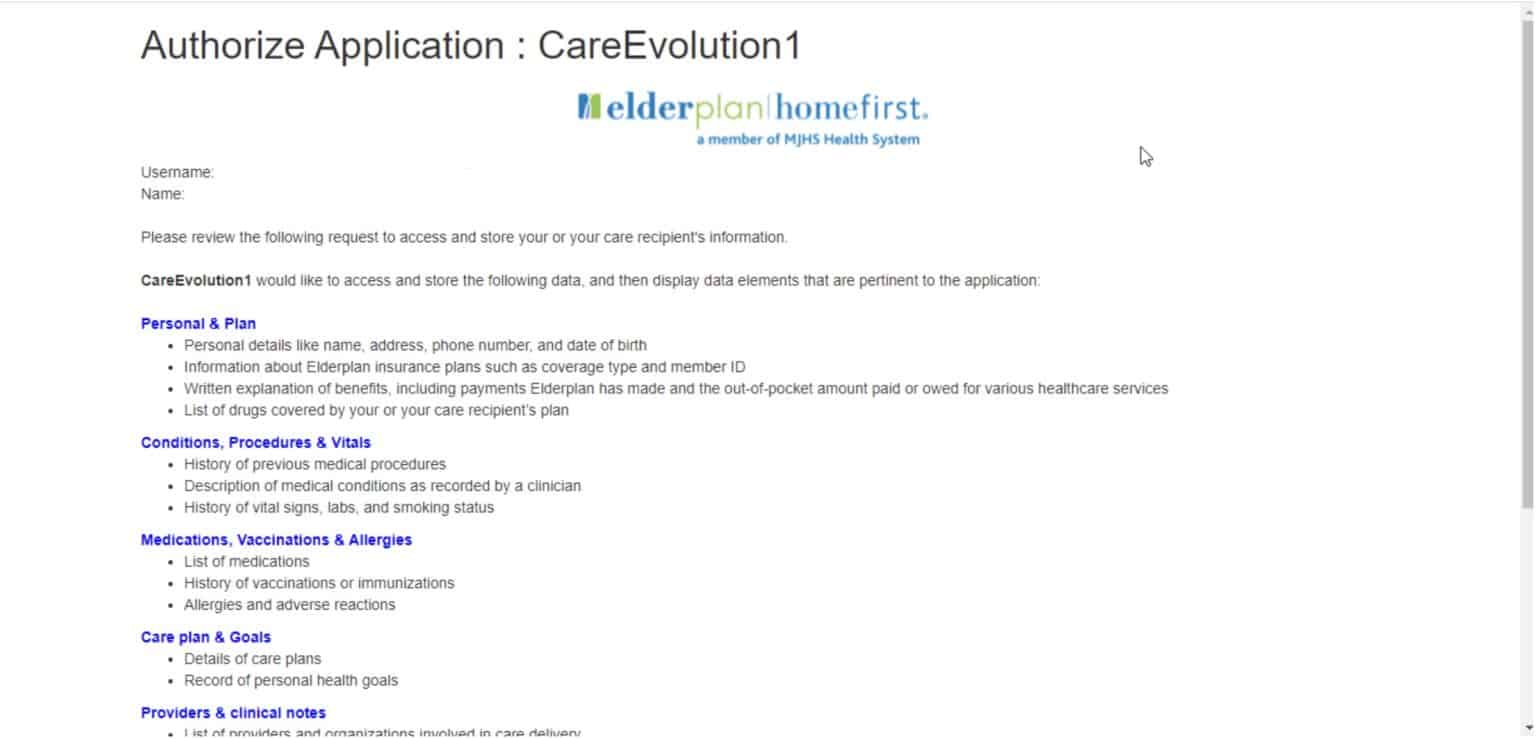
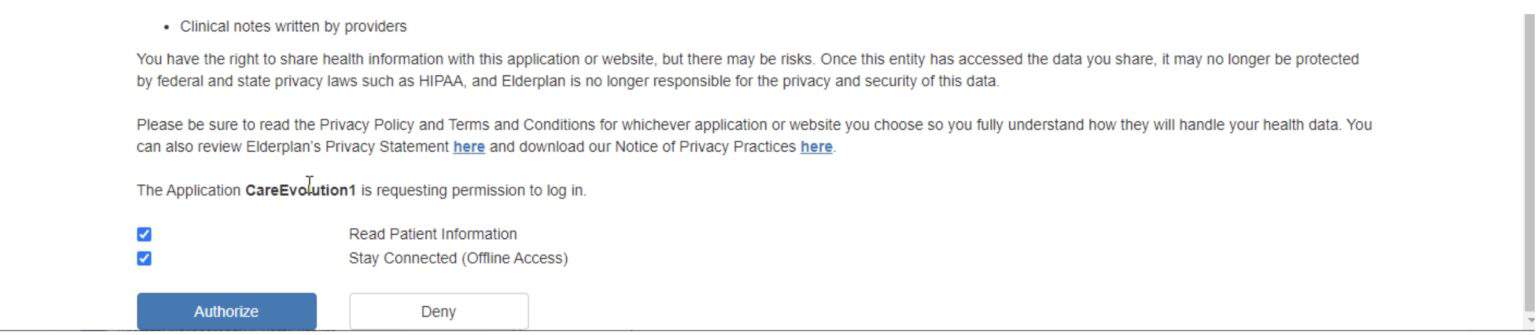
Step Ten: Authorize Application to Connect Data
Once you complete the registration/login process for Elderplan, you will be transitioned to the “Authorize Application” screen. Please click the “Authorize” button on this screen to initiate the download of your Elderplan data records to the app (for viewing purposes on the app).
In addition, there are two checkboxes titled “Read Patient Information” and “Stay Connected (Offline Access)” that appear on the Authorizations screen. Those checkboxes automatically default to a checkmark status. You should retain that check mark status for both checkboxes before authorizing the download of data records to the app.
Step Eleven: Data Download
After clicking the “Authorize” button on the Authorize Application screen, you will return to the My Data Helps screen. The app will begin downloading your Elderplan data records (to the screen).
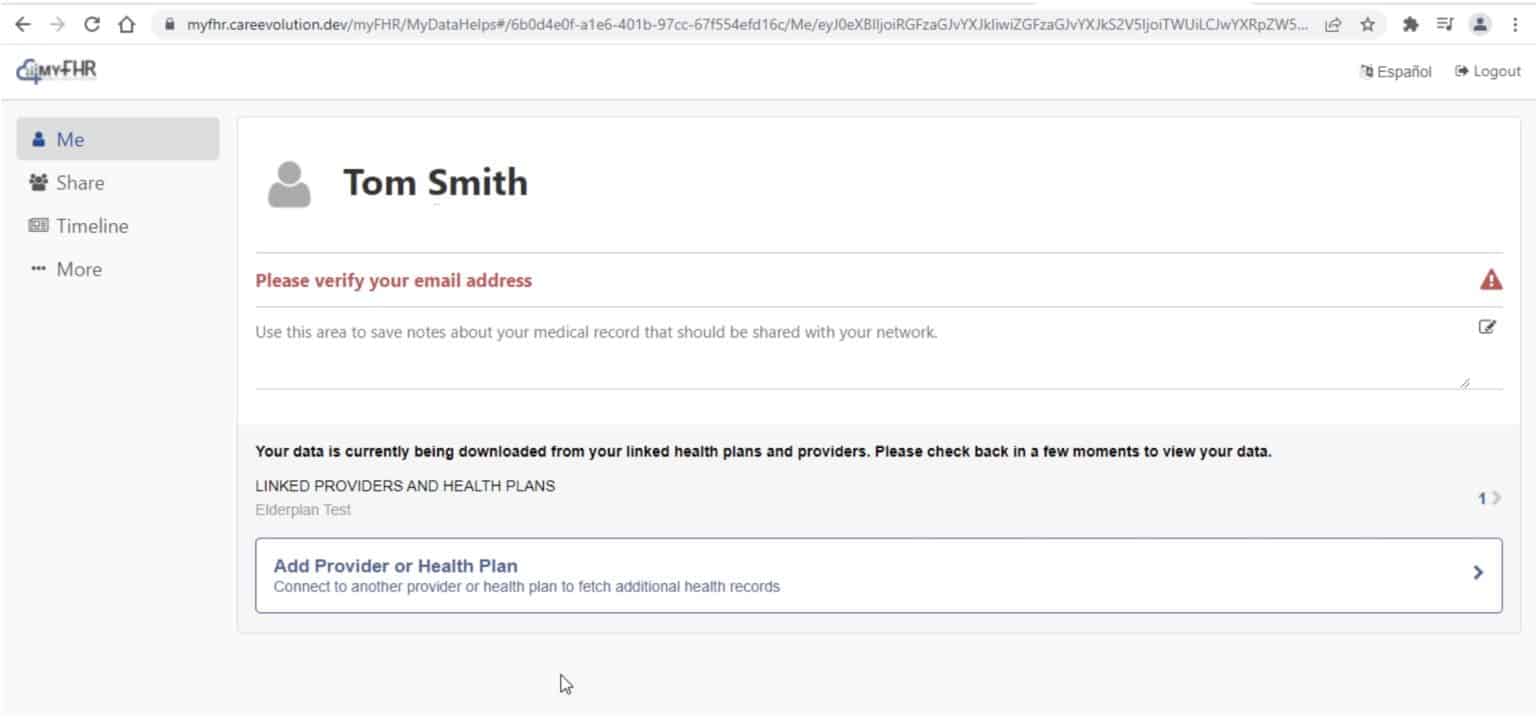
Step Twelve: Refresh and View Data
After a few minutes, click the refresh button on the menu at the top of the My Data Helps screen to refresh the screen and view actual data records.

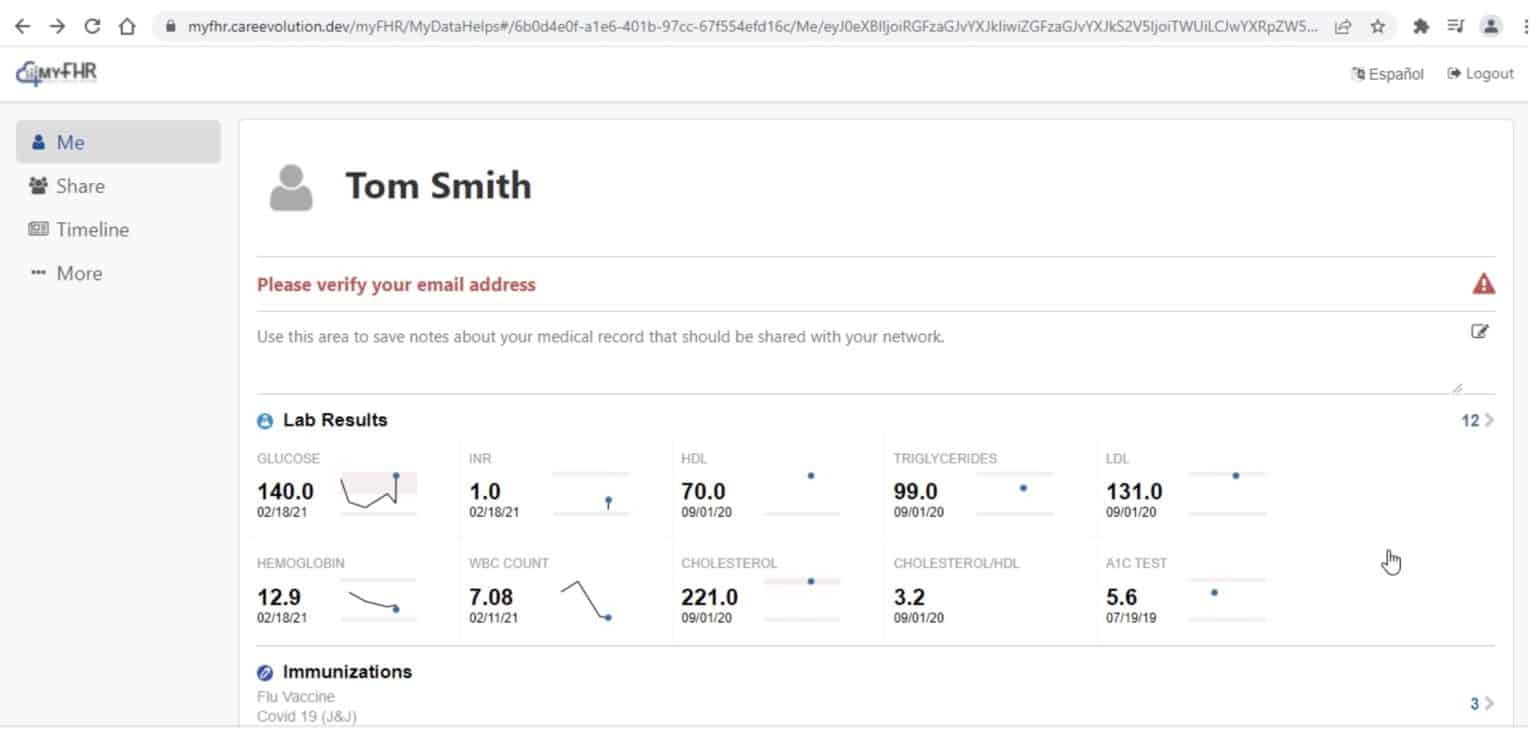
Once the initial setup has been completed for downloading and viewing Elderplan data, you can log out and log back into the app as often as you desire to view your records.
To log back into the app, you can use the following URL link:
https://myfhr.careevolution.com
Step One: Log in to CareEvolution App
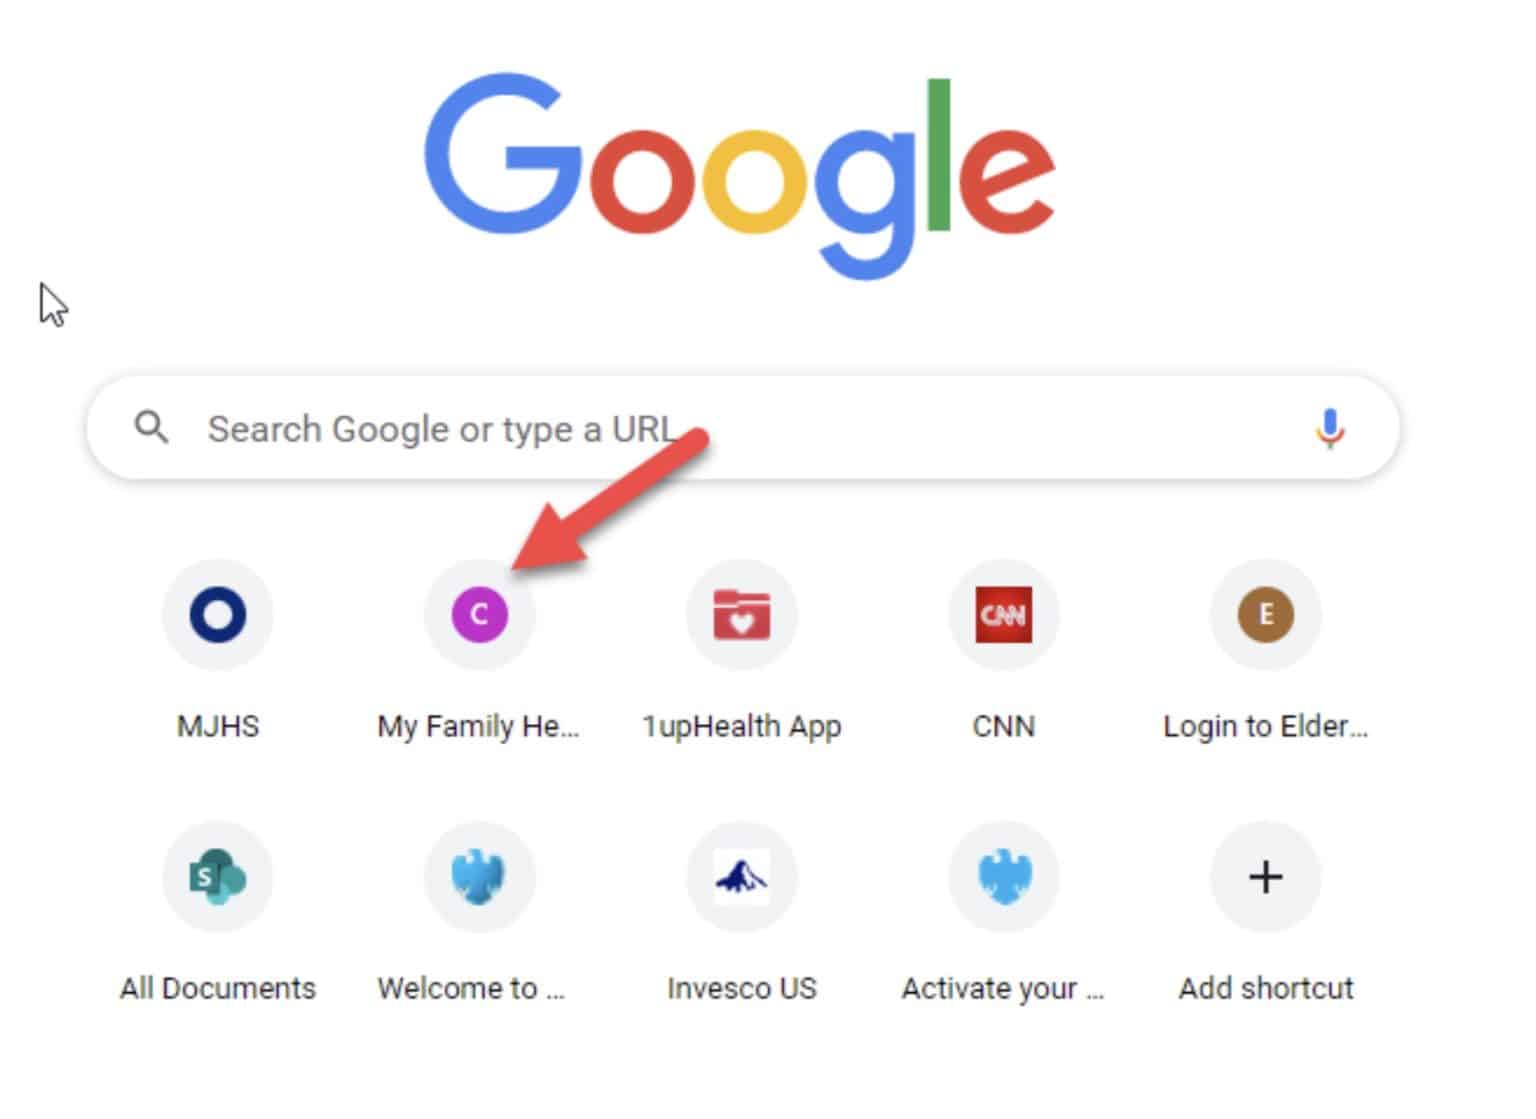
The most straightforward method for logging back into the app is by clicking on the “My Family Health Record” icon (representing CareEvolution) that can be saved to a typical browser search screen.
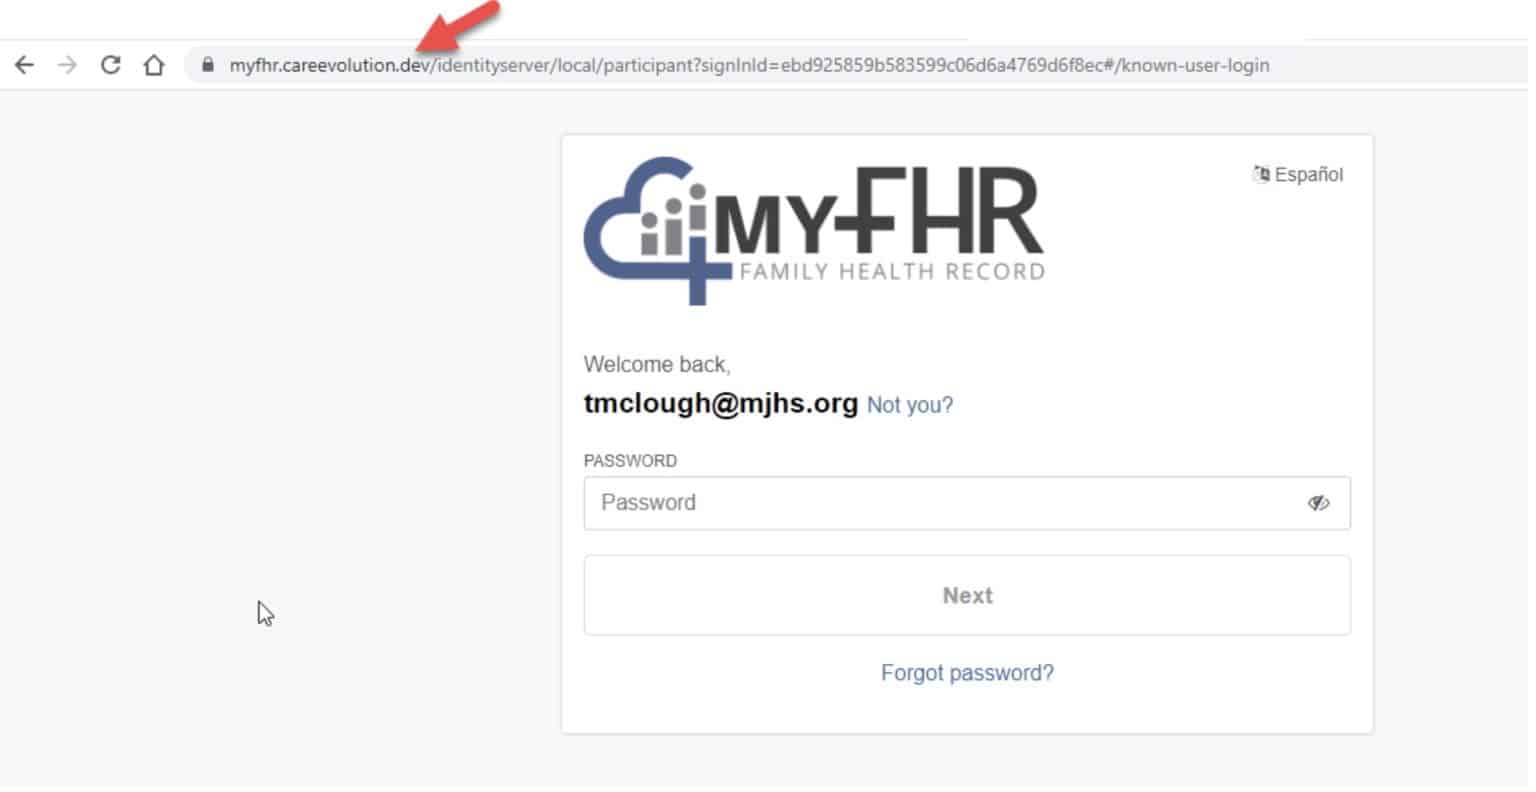
Step Two: User Login Screen
On the https://myfhr.careevolution.com/ user login screen, you’ll be asked to input the (CareEvolution) password and then click the “Next” button.
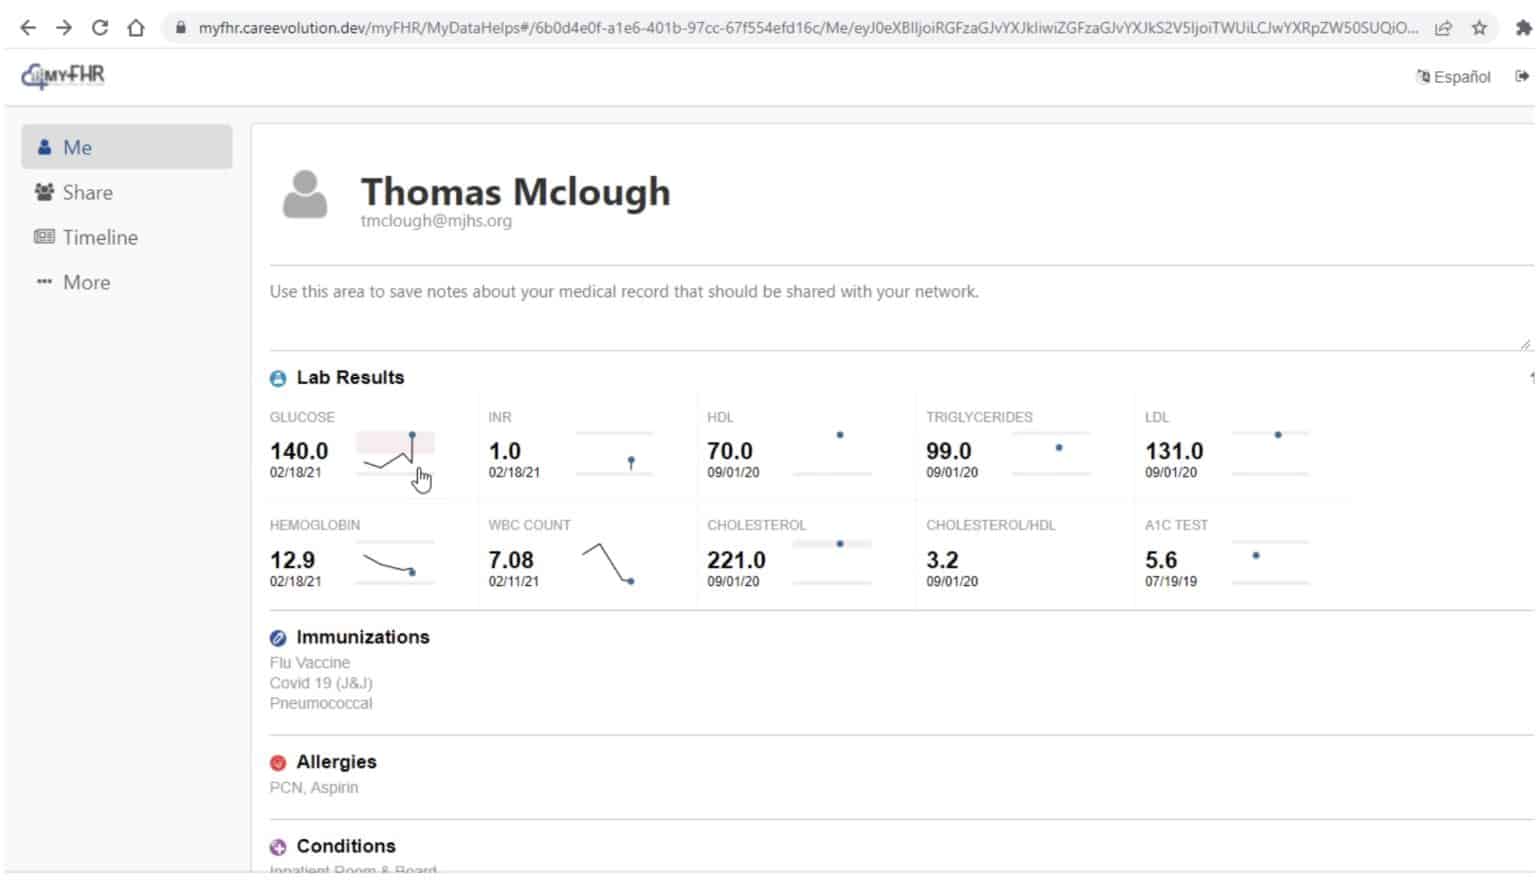
This action should transition you to the “My Data Helps” screen, where the user can access underlying data records on that screen.
Step Three: Forgot Password
If you forget your email and password combination, click the “Not you?” link (for resetting of email address) and/or the “Forgot password?” link (for resetting of password) on the https://myfhr.careevolution.com user login screen.
Follow the app instructions for resetting login parameters.
Once an initial set of Elderplan data records has been downloaded to the app, that set of records is static and cannot be updated.
To view updated records, delete the existing set of data records and then load a new set of data records. To do this:
Step One: Selecting Data
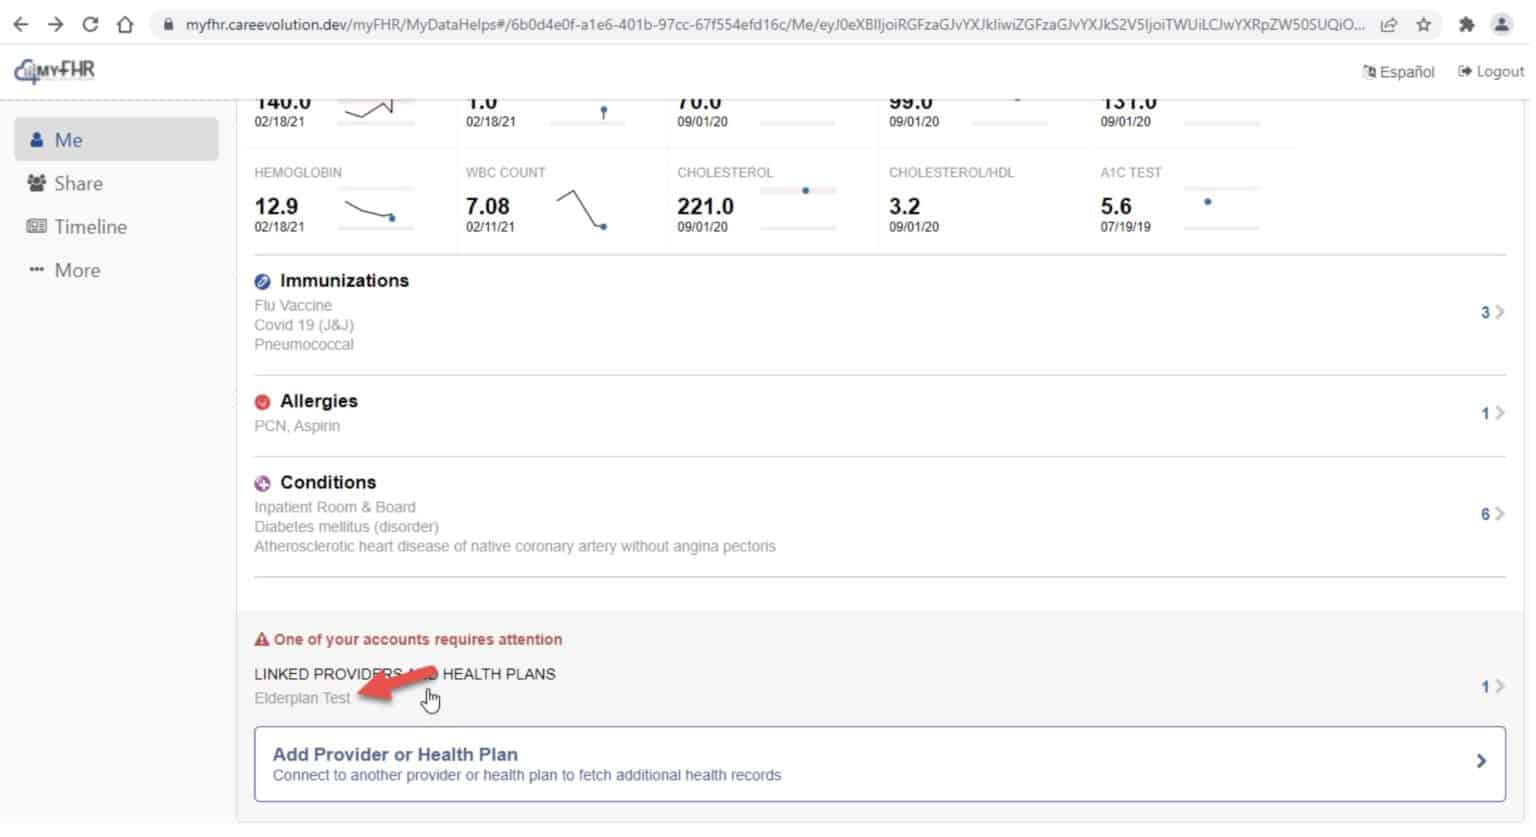
While logged into the app and viewing data records on the “My Data Helps” screen, delete the existing set of data records by first clicking the relevant health plan link (in this case, “Elderplan”) in the “LINKED PROVIDERS AND HEALTH PLANS” section at the bottom of the screen.
Step Two: Delete Data
The above action should access a secondary “My Data Helps” screen with a trash icon at the far right of the screen. Click the trash icon on the screen.

Step Three: Confirm Request
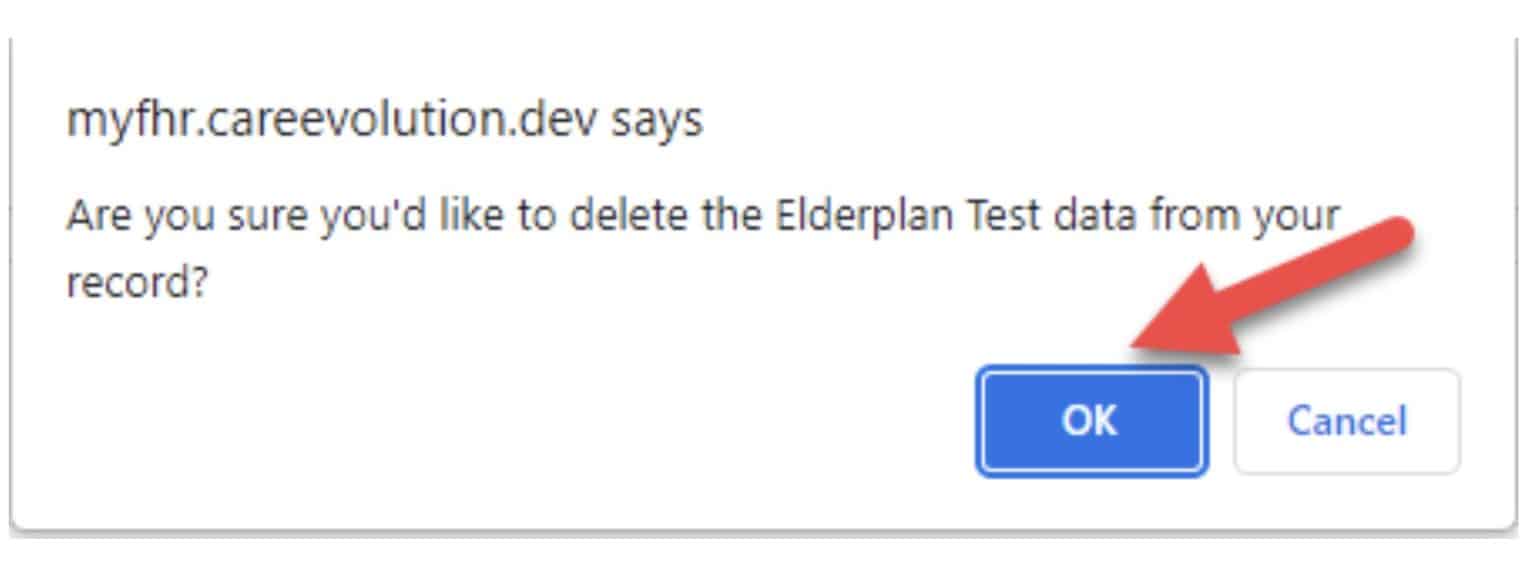
The above action should result in a system-generated message on the app to confirm the request for data records deletion.
Click the OK button (in the message) to proceed forward with the deletion.
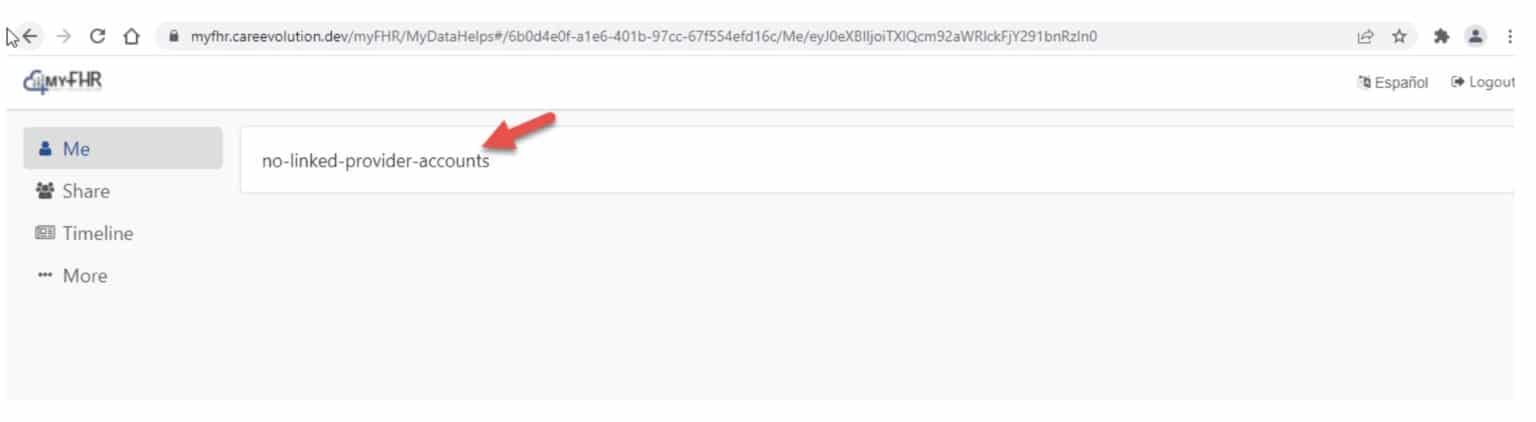
Step Four: Deletion Complete
Click the OK button (in the system-generated message) to delete the existing data records.
The app should then advise “no-linked-provider-accounts” after completing the deletion.
Step Five: Repeat Import Steps
Following the deletion of prior data records, you must repeat some steps from earlier in this document for the purpose of loading a new full set of (updated) data records.
Please logout, log back in, and re-execute steps 4 and 5 and then steps 10, 11, and 12 under Section 1 in this document to load the new set of (updated) data records to the app.